Paints used exclusively Dyan Reaveley Dylusions (first 12 released)
#1 - Petal Like
Gesso'd page as I did not want the text coming through too prominently. I also only used my brayer to apply as you know from the earlier post that I was limiting my use of tools and products for this challenge.
Started out using some of my StencilGirl Stencils (designed by Traci Baustista in this case) and layered them onto my page. Using my brayer, I rolled on some Crushed Grape paint.

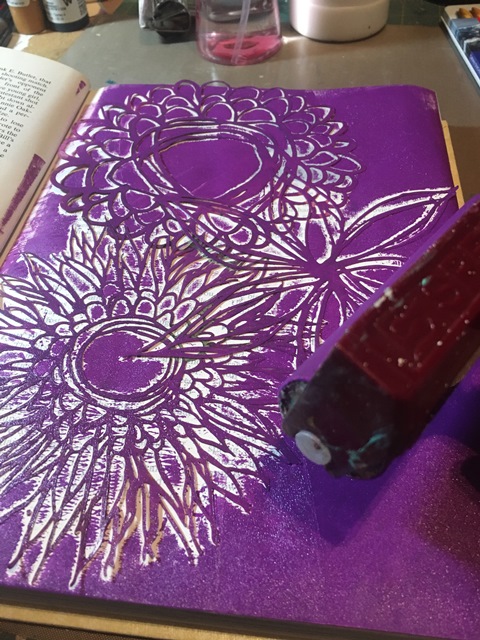

I then took my Liquitex Paint Marker in Black and doodled over the white space the stencil left behind.

Layered another batch of the stencils and this time used Fresh Lime.

I used Bubblegum Pink on some of my Rae Missigman stencils, again paint was applied using my brayer. I used one of my jars here as a brayer as I did not want my already pink covered one to transfer over and addition to the paint that was already on the reverse of the stencil (clear as mud right)! I did this with several of my Rae Missigman stencils (sorry no photos).

When I was happy with the base, I pulled out my Caran D'Ache NeoColor II Watersoluble Wax Pastels and used the Black one to doodle over the shapes to bring them out and just add yet another layer of interest.


Then I decided to spray it with water and see if I could mes it up a bit! Love how it turned out!


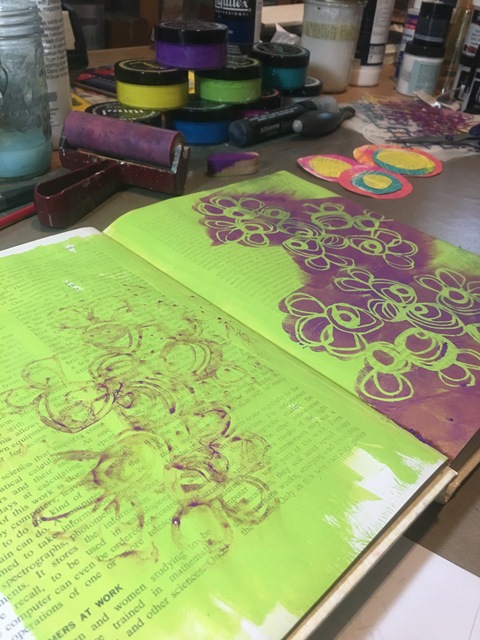
#2 Needlework
Using my brayer, I applied a good cover of Squeezed Orange.

Taking my StencilGirl Stencil Stone and Mortar Version 1 and used the brayer to apply Vibrant Turquoise. I then turned the stencil face down while still wet with paint and laid it back onto the page and rubbed it down to hopefully remove some of the excess paint.

Using Bubblegum Pink, I used a piece of plastic canvas to create a stamp and used it on the page.


Not wanting to waste the excess pink paint I had on my mat, I laid the stencil down on it and then put the book on top of the mat hoping to get a good amount of pressure and hopefully coverage!


Ya, not as good as I had hoped. It is there, just not a prominent. So I took out a sponge and applied some Fresh Lime through the stencil to create yet another layer. As you can see in the layers, I tend to turn the stencil so I get the shapes going in different directions.

Now it was time to add some marks - in this case, needlework...or in my case stitches. I used my Dyan Reaveley Paint Pen in Black.

I also added some stitched images using my We R Memory Keepers Sew Stamper


#3 Concentric
Starting with a Fresh Lime base, I took some vintage book papers from my stash and randomly brayers on some colors (Lemon Zest, Vibrant Turquoise, and Bubblegum Pink). I free handed cut circles in a variety of sizes.

Using the Crushed Grape, I brayered it onto and over my stencil

Just before I was done, I spritzed it with water and closed the book to get the transfer on the opposite page.

I layered my free cut circles by color and created 'flowers' to layer onto the page. I used Traci Bautista's Collage Pauge to adhere. This is a wonderful product as it is a matte finish and pens go over it fantastically!

I re cut a few of the circles so I could get a more interesting look (spiral like).

Then I began to doodle on the page. The Black is with either my Dyan Reavely paint pen or China Marker. The white is with my Liquitex Paint Marker.

Here are a few more close ups...


The fine black pen lines are with my Pilot MultiBall Pen (medium tip)


#4 Just Three
Using just three colors Vibrant Turquoise, Lemon Zest and Crushed Grape, I color blocked it onto the gesso'd page suing my brayer.

Using three Rae Missigman stencils from Stencil Girl, I used a sponge to apply the paints on or through the stencils.

Using my Liquitex Paint Marker, I wrote the number 3, three times.

I continued to use three different stencils three ways along with three pens (Liquitex Paint Markers in White & Black and my Pilot MultiBall in Black) three ways.


Here are a few close ups...


#5 More than One
More than one is an understatement for this spread! Starting with a base of London Blue, I laid out some stencils by Traci Bautista (as in #1), and brayered over with White Linen.


Pulling out some of the smaller stencils from Rae Missigman, I laid them out the brayered over them using Bubblegum Pink.


I did yet another layer - this time using only one stencil Clustered Triangles and sponged over top with Lemon Zest. This is a small stencil, so I kept moving it around and positioning it to fit the page. You probably think I am on something and think I used Squeezed Orange....nope! It is yellow, honestly! It looks orange because the paints were still wet and when yo put yellow and pink together - you get orange!

Here are a few close ups - love this one so much!


Now it was time for yet another layer! I free cut the shapes from packing list sheets from my wholesalers and adhered them down using the Collage Pauge again.

Wasted nothing from the cuts!


These over layers are from a previous book page that I had not used all the paper when I was cutting.


Started doodling and making marks using my Liquitex Paint Marker, China Marker and Pilot MultiBall pen - all in black.


The White marks are either the Liquitex Paint Marker or Dyan Reavley Paint Pen


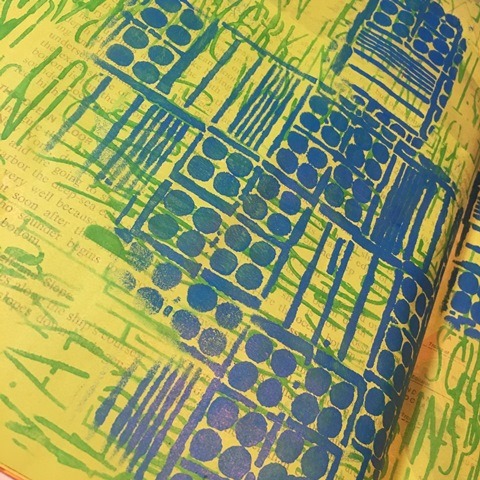
#6 Gridded
This color palette was inspired from an abstract image I had seen on Instagram and just had to use it! I was finding I was taking way too long on my pages so was going to try hard to start doing quick, easy and simple pages for the remainder of the challenge. The whole purpose for this challenge as Rae said was just to take time out and play. Many of her pages are completed in 15 minutes - heck many of mine were taking hours!
This time I scrapped on the paints using an old gift card trying to allow colors to dry slightly between applications. Being that the theme was gridded, I tried to keep with it in the application of paint colors too.

I used White Linen paint through a variety of Rae's stencils using a sponge. I have started using Sofft Art Sponges to apply my paints. I know that sounds ridiculous to many that know what they are made for (PanPastels), but I really like how thy dispurse the paint and do not absorb too much into its' pores (therefore less wastage)!


Once it was dry enough, I used my Pilot MultiBall Pen and free hand drew a grid pattern ovrthe entire spread. I then used my Liquitex Paint Markers in Black & White and started making marks.


#7 Dozens
Here is where I also decided to pull out Dyan's handy color chart. I created myself, you can go to her website HERE and read the entire post regarding it.

So for this day, I chose Fresh Lime, Cut Grass and London Blue. I figured if I pulled out htis chart, I would be more apt to use some different colors - and then of course use more paints up!
I am pretty proud of myself that I was able to continue on with the limited products and limited tools theme I had created for myself. The entire first week, my main tool aside from my brayer and sponge were stencils - and all StencilGirl ones too!
The base of the page is Fresh Lime and then I used Cut Grass through the stencil Picasso's Words


The next layer was London Blue through the stencil Brick Factory.


I then simply started making marks with my usual tools- Liquited Paint Pens (Black & White) and my Black Pilot MultiBall pen. This time I also included my Gelly Roll White Medium point pen. Here are a few close ups...


I think that is enough for today! That is the first week! Hope you are still here! Let me know with a comment - you never know, at the end of all this there might be a little something in it for you!
Have a great day....see you again tomorrow (I hope)!
** I have provided links back to my store for product that I carry. I have also linked the stencils I used back to StencilGirl. I do not get paid for this, I strictly do it for ease on your part if you want some of these stencils. **


No comments:
Post a Comment