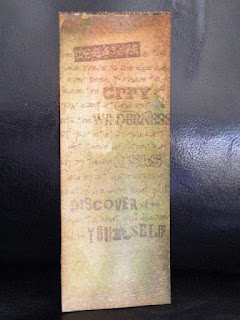
Project Inked #1 - No 5 Shipping Tag (manila); dabbed Distress Stains onto craft mat, dropped Perfect Pearls Powder onto 'dabs' then dragged tag through the lot! Spritz with water.
Project Inked #2 - piece of Watercolor paper; Sprayed craft mat with Dyan Reaveley Ink Spray and Perfect Pearl Mists and then dropped some Perfect Pearls Powders on top of the lot. Spritzed with water and dragged paper through it all; spritzed again with water and allowed to air dry.
Project Inked #3 - watercolor paper; dabbed distress stains, spritzed with water and over sprayed with Forever Violet Perfect Pearls Mists. Telling you color on this one, as it was a color we were struggling with. When Lynn used it on her pages she was getting a muddied color (was not pretty), when I allowed all mine to dry, then spray...this was the result. Kind of liked it.
Projected Inked #4 - Watercolor paper; Dyan Reaveley Dylusions Spray Ink spritzed onto craft mat, drops of Perfect Pearls Powders, spritz of water and dragged paper through it all. Inked edges with Vintage Photo Distress Ink and stamped image with Archival Ink Coffee. Hard to see in photo, but texture is almost like leather, pretty cool!
Project Inked #5 - no 5 manila shipping tag; stamped image with Archival Ink Coffee, used Vintage Photo Distress Ink to ink edges and 'color' tag, sprayed entire tag with Dyan Reaveley Dylusions Ink Spray melted Chocolate. Used the spray and flick technique with water and then once dried did a light spray of Perfect Pearls Mist. We had seen a blog earlier in the week that had done a monochromatic version of this tag (hers was green). If I can remember who it was, I will post credit! (UPDATED - I found the inspiration, just wish I had found it again before I had done the tag! Marjie Kemper, you are now safely tucked into my bookmarks!)
Project Inked #6 - no 5 manila shipping tag; direct to tag distress stains, dried with heat gun. Applied Distress Ink with blending too over stencil, then used a Dyan Reaveley Dylusions Stamp Set border for an edge. Inked edges of tag and used distressor to finish it off. Love this tag!
Project Inked #7 - no 5 manila shipping tag; this time I wanted to see what would happen if I just used perfect pearls as a color base...needless to say, I added to it. I tried spritzing with water once the perfect pearls mist had dried, distressed it with Victorian Velvet Distress Ink. Was kinda boring, so added the stamped image using Jet Black Archival Ink.
Project Inked #8 - watercolor paper; sprayed craft mat with Dyan Reaveley Ink Sprays (DRIS), Perfect Pearls Powders and some water. Dragged the paper through the mix...perhaps a little too much! It is pretty muddy, but I know I can still work with it! I did a final spritz with water to get some droplets.
Project Inked #9 - water colorpaper; this one was a oops..but had to post cause it was a funny story. Lynn was going crazy with her Dyan Reaveley Dylusions Ink Sprays (cut grass) and I picked up my next piece of watercolor to try my next experiment...and had a good chuckle when all I had sprayed was the Forever Violet Perfect Pearls Mist. Once the mist hit the paper...voila, it activated the 'dormant' ink spray....and there you have the result! I should have taken a closer picture, but it is a funny considering how much green is all over my table top now!
Project Inked #10; watercolor paper; this is just perfect pearls mists (with the odd splash of DRIS Cut Grass). Really hard to see in the photo, but frankly, boring! Let's move on....
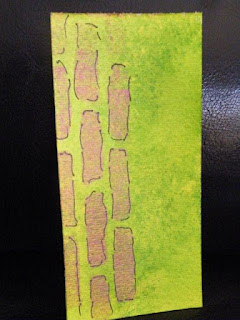
Project Inked #11 - watercolor paper; sprayed directly onto paper - DRIS (Cut Grass, Fresh Lime then Lemon Zest). Blotted with paper towel. Stenciled brick image using Perfect Medium the Perfect Pearls Powder Forever Red. Outlined bricks using black sharpie.
Project Inked #12 - watercolor paper; sprayed paper with DRIS Cut Grass, dried with heat gun, dabbed Picket fence over top to soften, applied Perfect Pearls Powder Green Patina over stamped image (hard to see, should have used different ink).
Project Inked #13 - no 5 manila shipping tag; sprayed craft mat with DRIS Postbox Red and dabbed Distress Stain Picket Fence beside the spray. Dragged the tag through the mix and allowed to air dry. Stamped with Jet Black Archival Ink (Dyan Reaveley Dylusions Stamp).
Project Inked #14 - no 5 shipping tag; sprayed mat with DRIS Postbox Red & dabbed with Distress Stain Picket Fence. Dragged tag through. Sprayed mat with water, and dragged through again. Allowed to air dry, sprayed with Goodebumps and Java Walnut Ink. Heat dried (note, do not heat dry goosebumps - was not a nice affect, or I just got too close - as it simply melted into a large nothing)!
Project Inked #15 - no 5 shipping tag; this one was a brain fart! Was thinking I wanted to do some 'resist' so stamped the image with Distress Embossing Ink. Heat dried it, then sprayed the entire tag with DRIS Black Marble. Then inked the entire tag with Distress Ink Black Soot. Distressed it a bit more with Distress Inks Mustard Seed and Spiced Marmalade. So what was the brain fart you ask? Where is the resist? Still don't know, guess you are having a brain fart too! I forgot the embossing powder!
Project Inked #16 & #17 - this was a total brainwave and WTF....the first one (left) was doing a resist with....GOOSEBUMPS! I laid the stencilGoosbumps. Allowed to air dry. Once it was dried I inked it with one of my fav colors, Distress Ink Mustard Seed, then Spiced Marmalade and finished it off with Vintage Photo. Pretty cool huh?! The next one we thought we would try the same thing using the reverse stencil, can you see the difference (aside from the color)? No? Me neither! Cause there is NO difference, aside from the fact that there is a border on the 'reversed' one that I did not bring onto the tag! Crap! I put links in this post to the the stencils so you too could see what we 'saw' or in this case...didn't see!
Project Inked #18 - no 5 manila shipping tag; put stencil (reversed chicken wire) on raw tag and dabbed with Snow Cap Acrylic Paint Dabber. Allowed to air dry (then got impatient and attacked it with the heat gun). As you can see, I perhaps got a bit too overzealous with the paint dabber! This is a resist technique that has been out for years, and thought I would try it using a stencil this time. Once it was dried, I applied the following distress inks...Ripe Persimmon, Evergreen Bough and Iced Spruce. Stamped image with Jet Black Archival Ink.
Project Inked #19 - no 5 manila shipping tag; Lynn thought she too wanted to have some fun with my brainwaves. She used the opposite stencil and used Goodbumps for the resist. She was unsure if she used enough Goosebumps...you decide! She used Distress Inks as well to color it up, Seedless Preserves, Ripe Persimmons and Mustard Seed. Stamped images are Dyan Reaveley and Jet Black Archival Ink was used. A quick drop of White Enamel Accents was used for his eyeball.
and finally...Project Inked #20!!!
Just wanted to show you how well the Distress Stains take to the raw seam binding tape! I ran the dabber over the ribbon on my craft mat, crinkled it up into a ball and left it until today! Pretty nice results aren't they!
All the supplies used in these projects can be found at W2 Scrapbooking, if you have any questions on any of the projects specifically - please feel free to contact me and I will gladly help you out!


No comments:
Post a Comment