....like I mentioned in the previous post, I was asked to do a video (insert hilariously laughing emoji here) by an art group I belong to to show my process on how I was creating my most recent art pieces. So in lieu of the said hilarious video, here is my blog post..
I originally saw the inspiration on a YouTube video by Jane Davies. In the usual Wendy fashion, I did not watch the entire video (those that know me, are not surprised right now), I am notorious for only watching parts of videos as I like to take the beginnings of the inspirations and then run with it on my own and in my own way. Usually it works out, the odd time it goes really bad 👎. This one was actually pretty good. I only watched the first couple of minutes and of course my mind was going crazy with ideas, I jotted them down in my journal and got right to work on it. If I had actually watched the entire video, I would have seen her version was pretty close to mine...almost 😉!
** I will bold the type when I share a product or a tip! **
I did mine on a 24x24" cradled wood panel (homemade) that I had painted on for an in-person mixed-media class I had taken many years ago. The panel has been sitting in my storage room for that entire time, just getting moved around every time I reorganized.
Started out with it buckled down to my easel and began applying magazine pages with Liquitex Matte Gel. I applied the medium using a 2" (cheap) brush directly onto the substrate, laid the collage element on top and brushed off the remaining medium over top then "squeegee'd" out the access using a bondo spreader (just google it, they are just an inexpensive plastic tool, usually come in a set of three, mine are yellow).
Kept doing this until it was totally covered. Then repeated three more times! yes, three (3) more times! I used magazines, painted papers, printed papers, tissue & patterns, and even vintage papers & ephemera - nothing in reach was safe! Here are a few pictures to show the layering process.
You can see I not only layer, but I overlap as well. This will give you the best coverage and results once you start to sand.
This is the end of day one - four layers! I suggest giving a minimum of 12 hours drying time (more if you are in humid locations).
When I came back down to my studio for the second day, I decided I wanted more layers before I sanded. My layers were not that heavy, so why not?! I started off with more magazine pages. A tip on the magazine pages - use thicker paper pages as they hold up way better for this process as of course the quality of paper is there to take the beating it is about to take.


You can see in the image below (left side) I started adhering a bunch of what looks like vintage ephemera - it is not. This is replicas - I will find out in the sanding process, not a good choice and total waste of product that can be used better elsewhere. It is simply due to it being printed on a heavier cardstock and once you start sanding, all you see is what is left of the cardstock (white) and therefore just a waste. As I type this, I think you are probably saying isn't it all just a waste if you are just going to sand it? Well, no, not really, as I am able to actually see the other layers of the pieces as I work my way through. Hard to describe, but if you try this, you too will see for yourself.

As I continue to create layers, I am switching up my colors you can see. So my tip of course is - with each layer created, not only change up the 'papers' but change up the colors. I don't often use bright colors in my art, I am more of a neutral kinda gal, so this was really screaming for some kraft color - which I added of course!
This idea was supposed to be really epic - supposed to be being the key word. These are vinyl numbers that you can pick up at any office supply store. The look I thought would be really cool as I sanded through eventually...you'll see! So next tip - do not use vinyl letters or numbers.
One last cover up using vintage ledger sheets. Now this one is going to have to dry for a good bit as there are so many layers now (5 new ones added to the previous 4).
Day three was exciting and a huge learning experience. Sanding...here I come! I got out to hubby's shop, clamped the substrate to the work table and pulled out his orbital sander (hooked it up to his dust collection system, thankful for that)! My first learning curve was the grit of sandpaper I was using, I started out with 220. Ugh. After the first [probably] 45 minutes, hubby came out to see how it was going and suggested I go to an 80 grit and work my way up to the 220. hmm, where was he 40 minutes ago?
This is how I dealt with those pesky vinyl numbers!
Once they were gone, the sanding was a lot of fun. I worked through each layer and as I got deeper, I would angle the orbital sander slightly to 'carve' into the layers and really create some interesting areas.
Here is a close up of the one above. These really remind me of a topical map.
Where you are seeing the wispy white areas, that is from the papers that I have only partially sanded through. This is where you can spray with water and go through the similar process used to do image transfer. But since I knew I was going to add more layers, I didn't bother.
This is when taking photos of your process are really beneficial. Not only are they there for seeing what looks good and what doesn't, but it also gives you the opportunity to save (and edit when needed) these to use for future printables! Upcycling at it's best when it comes to your art.
So of course it was time to add more layers. I definitely discovered that I really liked the look of the vintage papers (receipts, papers and such) the most, so added more I did!
Thinking it would be interesting to see how the paint would work through this process. I used DecoArt Media Fluid Acrylic Cobalt Blue, and then mixed it with titan buff, titanium white, black &/or grey to get my different tints, tones and shades.
Slapped some on, nothing special, no extra thought put into it aside from making it look similar to a collage.
I find I am one of the few painted collage artist that wants their collage to still be a focal point of the piece. Many artists strictly use collage as a starting off point to avoid the white canvas struggle, that's one thing that never even crosses my mind. It's kind of funny saying that as you look a photo of it totally covered by paint right now!
Simply started looking around my studio to see what else I could use - I have several boxes of the Tim Holtz as well as a really old [I think] Ruby & Hazel tissue rolls left over from when I had my shop, so needless to say, they became fair game too.
...more vintage papers
old dress patterns...
once again, you can see I added many layers so it was time for a good dry!
Day four, sanding like a crazy woman and had a few dang it's - totally my own fault. As usual, I can chalk it up to impatience.
The first picture here is simply to show how I work through my layers, approximately half of the substrate at a time. This is because I have it clamped down and need to be careful not to got too close to the clamps (only speaking from experience)!
what happens when you carve too much...yup, that's raw wood! No worries, it is fixable of course...with paper!
It's interesting to pick through the layers, you see parts that are familiar images from the magazines, book pages, receipts and such - and you can now see the paint too. Hard to see here, but I did fix the 'bald' spot where I sanded through. I simply hand cut out a book page and adhered it to the area. I also used a mix of titan buff, transparent white and glazing liquid (all acrylics) to blend it in. I then used the same mix to tough up areas that I thought needed to be softened. I also used some Cobalt Blue mixed with the above too in areas that needed it as well.
The next few images are me trying to decide where I wanted to go with this one. A trick I figured out a while ago was drawing/painting on a large piece of acetate and laying it over the base to see if I would like it and/or if the placement was what I wanted.
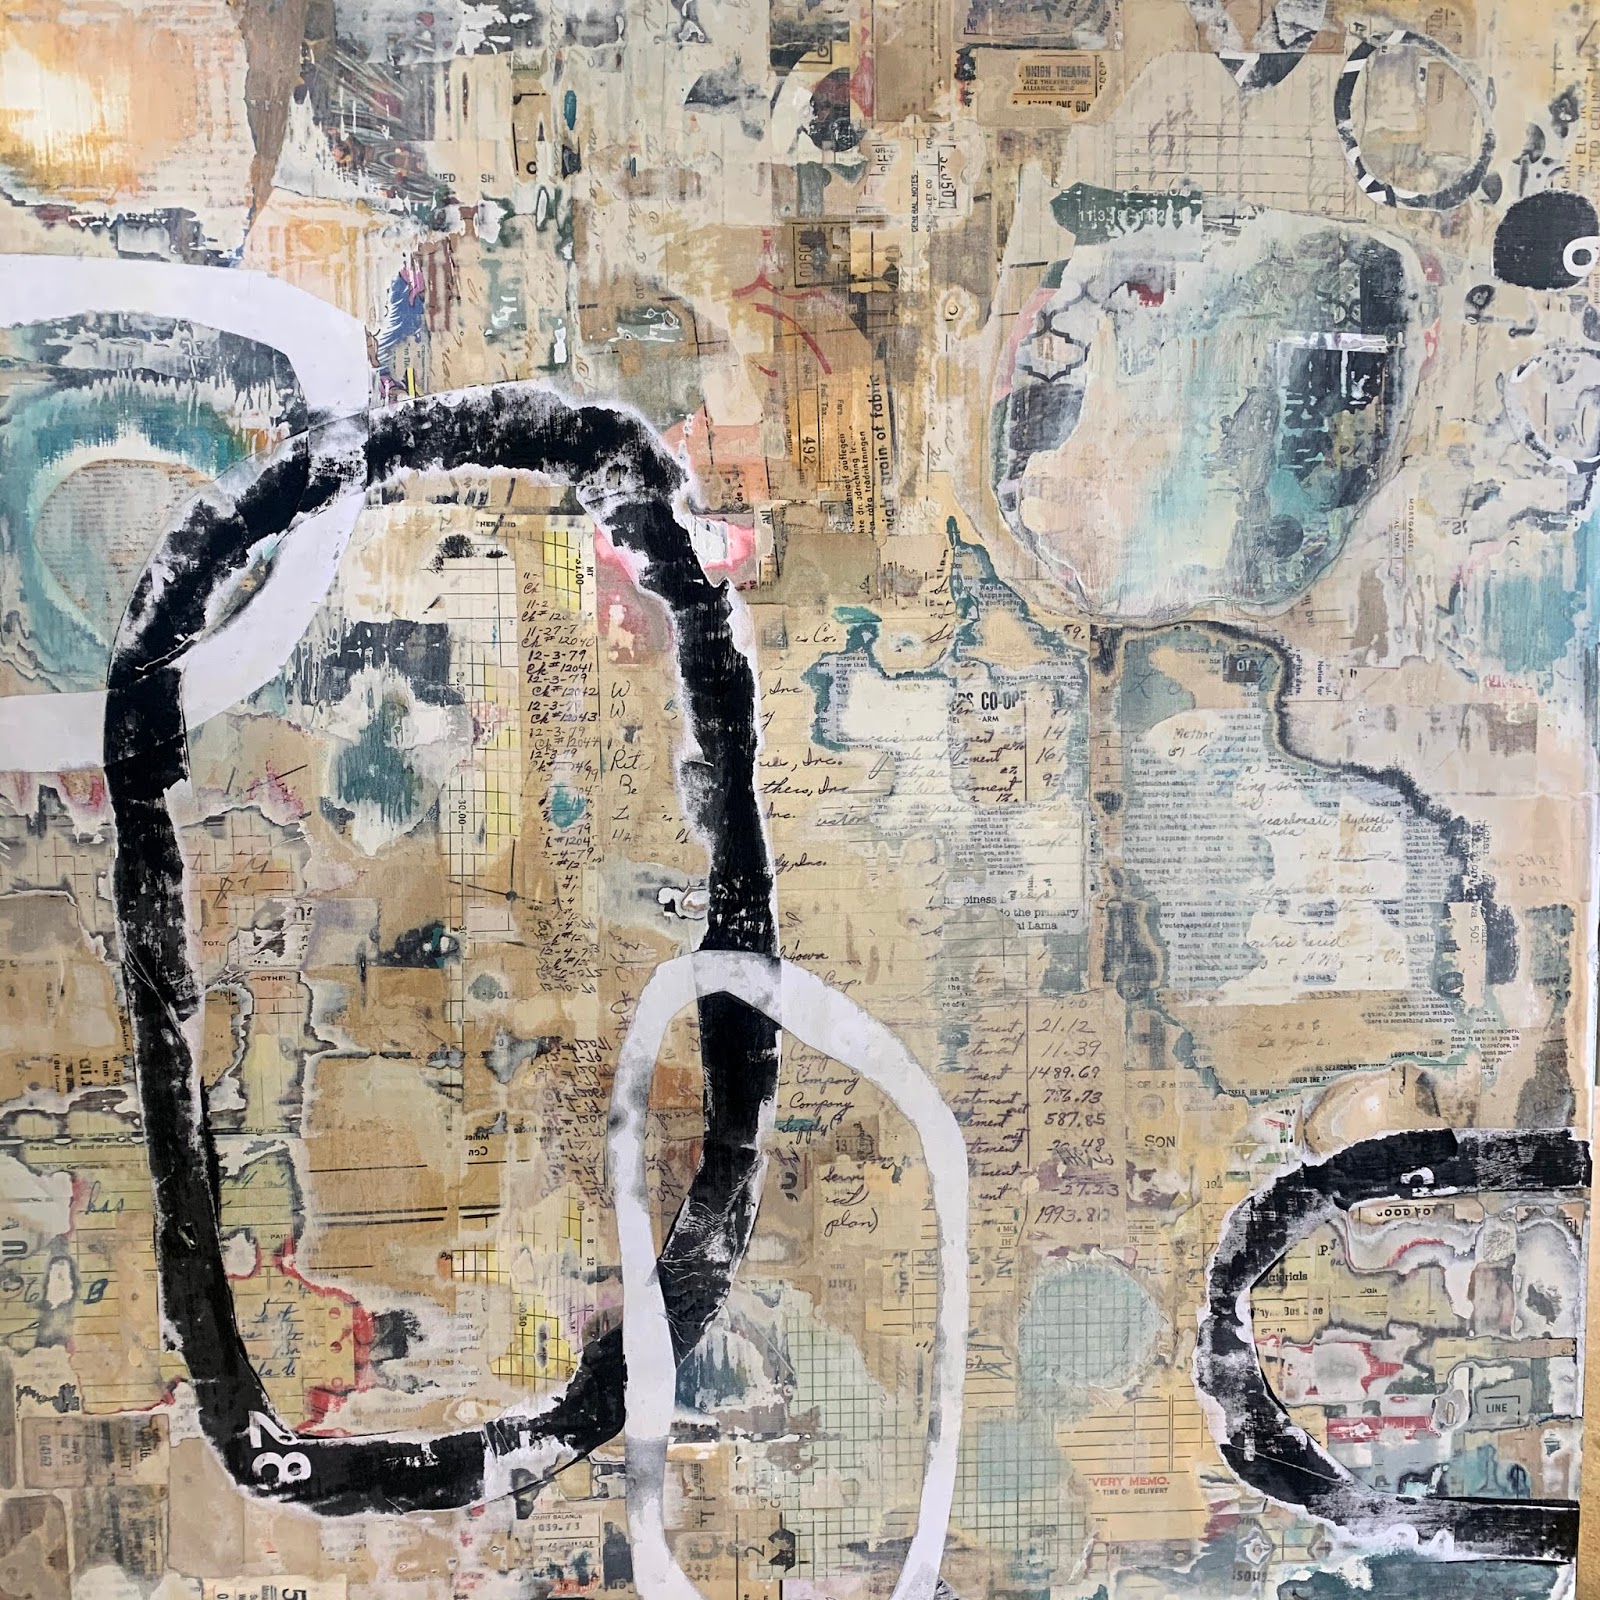
After playing around with these, and getting a good night's sleep, I came in with a plan....a different one of course! I knew it needed some black. I created some 11x17" calendars on Excel quite a while ago and had them printed off at Staples. I took the one that I created with the black background and free cut my shapes with an xacto knife. I played around with the layout a bit and ended up with second image being the one of choice.
I hand sanded down the black hoping it would appease me. I simply used one of those foam sanding blocks you can pick up just about anywhere, this one was a fine grit.
I looked at it for a full day, knowing it was bothering me - the white numbers on the black. So of course what to do? Why paint it of course, solid black. So how do you think that went?
Ya, you guessed it, more hand sanding.
I actually like it, don't love it, but like it. I have painted the edges black and it is currently sitting on the floor beside my easel where I look at it every day hoping that I will learn to love it or figure out something else to do with it. In the mean time, I have started on yet another piece to see if I can create something yet again, just a little bit different.
So, what did I learn in this first time process?
1. Don't use vinyl stickers.
2. Start with 80 grit sand paper and work your way up to 220 or even 320 if needed (via 100, 120 & 180).
3. Don't get attached to the early layers, as nice as they are, they won't stay
4. Every sanded layer produces some amazing gems.
5. Take lots of photos along the way.
6. Yes, you can sand too much.
7. Everything is fixable, it only paper!
8. You need to kinda think backwards when applying your layers, as colors, text and type of paper(s) matter.
9. This can & will open your mind to so much more creativeness.
10. If you want to see the original video that inspired this adventure - check out Jane Davies here.
If you have any questions, simply comment and I'll get back to as soon as I can.
This project was a perfect example of my motto(s) - It's just paper &/or paint, it's just play, it's just practice and it's just me exploring art!
Have fun and create something new today!
If you want to see more of me, I am more often on Instagram than here on my blog....
@w2studioarts. Thanks for sticking through this really long post!