Here is the 'ready to be junked' one:
I pulled out a couple of my bundle purchases from Suzy at PaperHarborCo as I wanted to use them to actually create the base of the journal. The first thing I did was pull all the papers out and apart and sorted them into similar sizes.
When I stack, I take into account the direction as well as size of the papers - I definitely like to mix it up. My papers are stacked in an organized yet random pattern. If a paper is too long, I simply offset the centre to accommodate for a folded flap that can be manipulated later.
Today I decided to make my cover 'fit' the subject matter. I don't often do it this way, but since I had it, thought it only fitting!
I created three signatures for this journal, it fit perfectly.
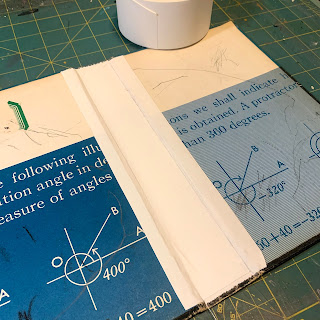
Once I gutted it, I secured the spine with book tape - overlapping it in the centre for extra security before stitching.
Now it was time to get to the mathematics of formatting the template for hole placement & stitching. I usually create a template the length and width of the spine. I measure out the vertical and horizontal lines. For the vertical lines, you need to take into account the number of signatures to be used and centre accordingly. As for the horizontal lines, I always measure in one inch from the top and then one inch from the bottom for my starting points. From there, I measure the centre between those then the centre from the top to centre and bottom to centre - clear as mud, right?!
There the lines cross are your future stitching points and need to be punched out. I use an awl and a foam pad. The pad is simply to protect my mat underneath. You can also use an old phone book or the guts from your book if you are not going to use them in another project.
A few things to note on the photo below -
1. mark your template with top and bottom. It makes a difference when you go to punch your signatures.
2. mark your signatures with pencil so you can line up your template.
3. you can see that the template is longer than signature, I centre it on the signature and make my pencil marks
Now start punching. As this is the first signature, you need to punch through the signature from the centre fold
Now it it time to start stitching. I use the basic five stitch which is very simple to do. You can find the how to anywhere on the internet. The photo below actually shows me adding the second signature - this is where it shows the importance lining up your holes. One thing I will say is that I use way more cord than one probably should, but it is because I wan the tight stitching and to do that, I need to be able to see where my needle is going....preferably into the right hole!
This next photo show how it looks before you complete the full five stitching, it is a very important part. There is thread at the top and bottom, and you need to pull the two threads away from the book - pull up and pull down all while keeping your hands and threads lateral to your book back.
There she be, all three signatures in and secured.
Here is a little peek inside, you can see the layers and folds...
...and look at all the goodies that are ready to be added when the time decides!
I also started work on this one...
It has four signatures - each one a little different. One all blank ledger sheets, one all written on vintage ledger sheets, one mixed ledger sheets and one mixed office papers.
I have my book gutted, template all measured out and ready to punch the holes through the signatures. then all I have to do is stitch them into the book. The one thing I did differently this time around, aside from four signatures, is I glued on vintage ledge pages to the inside covers. They look awesome!
Thanks for popping in. Hope you enjoyed seeing my process, be sure to leave a comment with any questions and hop on over to Instagram or Facebook (@w2studioarts) to follow along where I tend to post more regularly.


No comments:
Post a Comment