Showing posts with label MUM. Show all posts

Monday, December 7, 2015

December Mix Ur Media Kit - FINALE!

First let me start off by thanking each and everyone of you for the HUGE amount of support for this year long event!  You all are such creative souls and make this adventure I do a pleasure...not a job!

Without further adieu, here it is the GRAND FINALE...


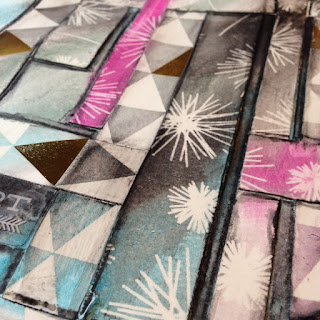
This kit is loaded once again with amazing goodies sure to inspire (or even challenge) your creativity.  There is watercolor resist paper, tattered tangled papers, sticker or rub on sheet, date stamp, loads of paper ephemera in a variety of sizes, metal flowers, buttons, transparencies, die cut paper and of course a Fude pen for doodling and gelato!!

The kit retails for $14.00 and you will be sure to get a load of use out of this one!  


I have been working on several pages with it and have hardly made a dent in it!  I will post more photos later this week, but for now...here is a quick peek.

I will post more info on each of the samples in a separate post later this week!!


Once again...thank you all so much!!


Monday, November 2, 2015

November Mix Ur Media Kit!

**  UPDATED  - scroll down for some great ideas  **

Yes, it is here! It has once again been a very busy month and even though I was able to get the kits together, you all kept me so busy in the shipping end of things I literally had NO time to play!

I am really happy with this month's kit and can't wait to play with it (this weekend)!

This MUM kit is inspired by one of my favorite designers (that is no longer designing in the paper crafting world...insert sad face here) Jenni Bowlin!  For those of you that know me, know I use Jenni's products allot!  Or perhaps I should say...hoard her products allot! I create many layouts and pages that I like to call Junked Up Jenni!

Each of these kits has been coordinated with a great variety of products that will surely aid you in your next crafting project.  It is loaded and I mean loaded with goodies - paper, stamp, rub on, stickers, ephemera - my mind is already full of ideas.


Remember that not all kits will be the same, colors and patterns may vary depending on product availability.

Get yours while you can...limited quantities!  I will be creating with mine this upcoming weekend so will post some inspirations at the bottom of this post next week!

  **  NEW  **

**  Here are a couple of pages I worked on with the kit:  **

Using all bits and pieces of paper and ephemera from the kit, I layered them onto my journal base with Matte Medium


wanting to tone down the piece, I gave it a scratch coat of Gesso with my palette knife.


Once dired, I started dry brushing and finger painting Dina Wakley Media Heavy Body Paints over a variety of her stencils.


I then added my stamped image using the stamp from my kit, doodles using my Uniball Signo Black Pen (all time fave). And of course a page would never be complete without the use of a FineLine Applicator filled with Black Fluid Acrylics (not to mention of few ink splats too)!! 


The next project was done in my Donna Downey Journal, and once again I started with a collage base using papers and ephemera from the kit.  Once it was down (using Matte Medium), I scraped on Dina Wakley Media Heavy Body Paints using an old hotel keycard.


 One the opposite side, I layered a stencil (Stencil Girl from my stash) image using Gesso.

Here is a better view of the layout so far.... 

Now I pulled out my Art Fusion Rubber Stamps from Art to the 5th added some additional doodling and paints


This page -  doodled through a stencil (yellow), and of course added more stamp images and lines for words.


 Turned out pretty good I'd say!


Thanks for stopping by, be sure to come back soon and don't forget - December is the LAST month for Mix Ur Media Kits!  Once they are gone...they are gone for good.  

2016 will be the start of something new once again!


Monday, October 5, 2015

October Mix Ur Media Kit

Wow - where the heck did September go?  October came up on me way too fast and because of that...I really dropped the ball on getting samples done and arranging a guest designer for the month!

The kit has been created and is a great one yet again.  I sat down over the last few days and took some time to play with it.  This kit is full of great paper product looking to entice you into adding some collage to your next project.


This kit is once again loaded with texture and endless possibilities! Rub On, Stencil, Art Screens, vintage paper images, texture elements in tissue, paper, vellum, ribbon, metals and more! Can't wait to see what you create with it too!


Here are a couple projects that I worked on...

Inspired by...Collage!

I tore up the vintage paper images and textured wall paper and layered it over the gessoed page.


Decided you use one of Dyan Reaveley's paint combos she suggested - and yes, it does work!
I was on Pinterest earlier and saw an image that caught my eye - it 'kinda' reminded me of this color combo so thought...why not?!  Here is my take...


I took a sheet of the vintage images and free cut some circles!


Adhered them down with Matte Medium


Added some Daler Rowney FW Acrylics in Black so I could get the drip-age I was after.  I also accented the circles and lines within the page using my Faber Castell Stamper's Big Brush Pen in Black (best accent tool ever)!


spritzed with water to get the 'spider' legs I love so much.


It needed white, so used my Fineline Applicator filled with White paint and air brush medium 


The next page is one again inspired by...this time I think it was something I saw on Instagram, but I can't find it now (so sorry)!  The lady had basically loaded up either side of her journal with paper and ribbon then covered it with gesso.  I went one side...

I have used the vintage image papers again, vellum, tags and then the bottle cap and zipper pull.


I also wanted to try something a little different this time around.  I am only going to use the old hotel key card to apply all my mediums.  I used to adhere the papers onto the page (no gesso this time to start) using Matte Medium.  Next once it was (more or less) dry, I applied Gesso over the entire page. Really like how it came out! 


I cheated here a bit...I sprayed the bottle cap and zipper pull with Dyan Reaveley's Dylusions White Linen Spray.


Now I will have to continue this post later as I am out of time and I still have the page drying!!

I will be back soon....I promise!

In the mean time - be sure to head over to the shop to see all the NEW goodies (posting lots of new stuff today) and check out the new CLEARANCE section with huge discounts sure to entice you to add to your stash!


Monday, September 7, 2015

September Mix Ur Media Kit!

Well, summer is somewhat over and most kids are back in school and we are all desperately trying to get back into the groove of it all.  As you are aware, I took a good part of the summer off in hopes to once again find the love for this wonderful creative craft we all do.  I was so burnt out from this past 10 months I was seriously ready to pack it all in.  Thankfully I had a couple good friends talk me off the ledge.

By taking a good 6+ weeks off from actually creating anything, and simply just doing the day to day needs in the shop I have found my joy!

Well enough of that...I am sure you have all come here to see the new release!


This months kit is loaded with texture and even patterns.  I really found my mojo playing with this one!  


Here are some of my samples...

Inspired by...art journal page:


kit items used:  vintage book papers, kraft frames, kraft tags

Julius....art journal page:


kit items used:  vintage book papers, kraft frames, wooden glasses, printed papers (used reverse side to print off Julius) as well as torn up pieces to decorate inclusion.

YOD...art journal page

and yes...YOD does mean something!  Think 'travel'.


kit items used:  vintage book paper, burlap, pleated canvas, chalk tape, chipboard letter plates, weaved wicker, kraft frame, wood veneer (rectangle and gears)

The Five E's....art journal page


kit items used:  burlap, weaved wicker, chalk tape, printed paper, kraft frame

Favorite Smile...art journal page


kit items used:  vintage music sheet, kraft frames, chalk tape, kraft tags, frosted film

* * * 

Now for my Guest Designer for September.....Katherine Currie!  Katherine has done some amazing pieces and I can't wait to share with you.  I always simply give the package to the guest and tell them have fun.  All I ask in return is a minimum of three projects!  Katherine rocked them out!

12x12" Layout

I used three Kraft frames to make photos appear like "polaroid" inspired; inked one of the Kraft frames in Mowed Lawn and added the Frosted Film over the wider area and word LIFE.created the frost effect I wanted to go with the picture of the drizzle and rainbow at the top of Sulphur Mountian. I also inked one of the die cut tags in the same Mowed Lawn and added a cork arrow to the centre & burlap string through the tag hole. I distressed the edges of the letters and I used a couple of burlap "strings" to extend the cables from my lift photo.


8x10" Canvas

I used strips of the book pages as a side frame and used a hexagon punch on the book pages as the deco pages to create a shape. I broke one of the wood veneer in half and layered another on top to add depth. used the back side of a chipboard number as well to add depth to the canvas. Used my mixed media supplies to stick everything down and then covered it all with light Gesso coat. Sprayed using Bloom Sprays and painted the "grapes" with Dina Wakely paints. It still need more texture so first I used and mask on top of the wood veneer and then I used the cane webbing to create clumps of grapes on the bottom with modeling paste then dry-brushed paint over top when dry. I used pieces of the cane curled as grape vines. stamped on the back of the chipboard number. used the chalk tape to create labels clipped with mini clothes pins.


Tag #1

I "Mustache" This... yes its corny!  Layered a strip of the deco mustache paper, wood cog, die cut tag, wood mustache and cork arrow/ outlined the wood mustache with a white gel pen. added the pleated canvas to the bottom


Tag #2

Covered a plain white tag with strips of book paper and inked the bottom with Fossilized Amber. Added a wood cog. layered a piece of the cane webbing with a scrap of wood veneer and burlap. from there I built a cluster of Prima flowers and pearls to look like they were climbing the webbing. Used a couple of Burlup strings at the top of the tag.


What a great job Katherine!  I am always amazed how each and everyone of you take these kits to such different places!  I truly enjoy seeing how you use the items.  Sometimes the kit items are very simple and then sometimes I through in an item that totally throws you for a loop or sometimes you surprise me and it doesn't throw you...but me!


That Other Neutral Triptych

  That Other Neutral Triptych wrapped canvases 10x10x1.5" (x3) professional grade artist materials I worked on this smaller series at ...