Showing posts with label sketch. Show all posts

Sunday, September 17, 2017

Art Journal Inspirations

I have continued to be really inspired lately and am taking it out in my journals!

I have a Strathmore Mixed Media Journal that I keep with me all the time and it is what I often make notes in for future ideas (classes and pages), paint samples & experiments as well as pen sketches like below.

Everyone knows how much I love botanical images.  There are a ton of downloadable images on the net which always get my creative pen flowing.  I had picked up a painting book at our local library and it got me in the mood to sketch.  The book was on painting flowers which I just don't think I am there yet, so ended up doing some sketches...love how they turned out!  All I used was my Pilot Multiball Fine point.


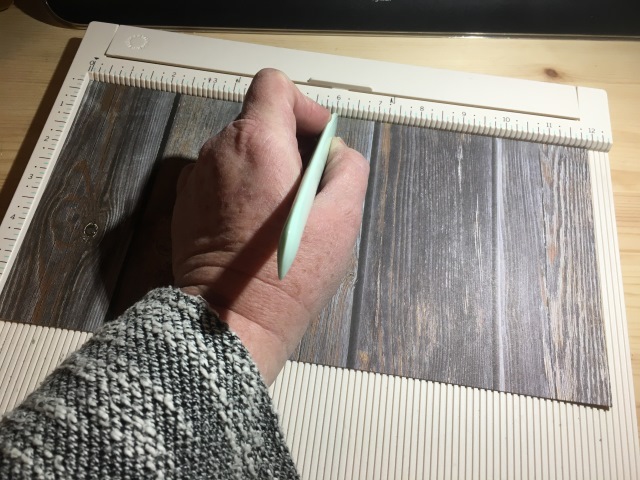
This next one was originally inspired by layers of vintage papers I had seen on Instagram.  I have such a huge stash of papers (scrapbooking and others) that I thought I would pull out some of my favorite Jenni Bowlin Studio collections and cut them up randomly to see what I could get.


While my page was drying, I was surfing Instagram and came across a post from France Papillon and it totally made me go in a different direction.  Here is the image I was inspired by:

There is a full tutorial on this on her YouTube channel, I followed fairly close.  I simply used what I had and pulled nothing from the shelves.

So off I go on a tangent!  Scraped and plastered Liquitex Flexible Modeling Paste onto the pages being sure to get a good rough finish and a good build up on the edges of the papers.


I then added a good layer of Prima Heavy Gesso (it was what I could find easily on my desk top, but my fave is the Liquitex Super Heavy Gesso) and the addition of DecoArt Media's White Crackle Paint.


Again, getting into the grooves and really using my palette knife with the gesso.  When I added the Crackle Paint -it is important NOT to over work it as you will then limit the amount of  crackles you will get once dried.  Another tip is to allow to dry naturally for the best crackle effects.


I allowed this to dry over night and in the morning, I applied a glaze using Golden Acrylic Glazing Liquid and Payne's Grey (twice).


...and then a glaze of Titan Buff, really working the glaze into the cracks.


I applied this glaze twice and then the third time...I omitted the Glazing liquid and used straight up paint!  I preferred this effect to get the darker impact.  Here are a couple of close ups. 


Now it was time for color!  I started off with DecoArt Cadmium Orange Hue, dry brushing it into the areas I felt it worked best for composition.


I would go in again with my fingers really rubbing in some more to get it darker where needed.


I would blot with a rag or Deli Paper at times as I wanted to pull back some of the color. 


Again, really worked in the paint into the cracks.


I added DecoArt Media Quinacridone Red and Medium Gray where I wanted colors to either pop or be subdued.


I was really liking how it came about and was going to leave it as is.  Then I went and watched her tutorial to then end and thought otherwise.


It needed something - a photo! Well in this case, a picture on some paper (Jenni Bowlin Studio Red/Black Line Extension  III). The addition of the words are from Tim Holtz Small Talk Sticker Book.


Just look at the texture I was able to achieve here!  I am including a few drool worthy images to show off how amazing the textures are.


I decide after looking at the photos on my phone, that I need some shading.  I take one of my black markers (I believe it was my Sakura Sensei) and as soon as I lay down the line of ink, I rub my finger along the mark to buff it out.


You can really see it here on the left hand side, love it!


I think that is good for today, I've (hopefully) kept you here long enough!  I will work on a few more posts over the next couple of days to share more of what I have been doing.  Don't forget to keep an eye on my Instagram and Facebook accounts (and I'd love it if you would follow along) as I tend to post there more often (just not as much detail)!

Most products are linked to my online store W2 Scrapbooking & Mixed Media Art Studio and if I don't carry it, I will usually link to where you can find it.

until next time...

Saturday, February 18, 2017

Happy New Year!? Happy Valentines Day!? Ya I pretty much suck at this....

Not sure how many times I can apologize for neglecting my blog! Is anyone still out there?  Have you given up on me?  Please don't!

January and February are crazy busy months for me as I am working my year end and of course dealing with all the new stuff releasing with Creativation/CHA to make sure I get all the new goodies that everyone wants.

Is my year end done? Nope
Is new product all here? Nope

That about sums it up!  But not to worry, I am constantly working on it all!

So what have I been up to creatively (since the last post way back in 2016) you ask?  More than I had hoped that is for sure.  This may take a while so I will break these last few months into a few blog posts (you'll appreciate it for sure)!

Here goes...

Digital Art!

I am not one usually for the digital art thing - I really like to 'touch' and 'feel' my work.  I had taken a workshop with Traci Bautista back in 2015 called art.journal.PLAY2015 and as usual I either got too busy or sidetracked by some other shiny object!

This fast November I went back to Traci's site and decided to complete it before I lost it (was due to close Nov 30), so when through the entire class again, took notes as I watched video after video.  Came on one of the classes I don't even remember - probably due to it being digital (Digital Canvas) - and watched it all...hence what you will see next!

These were all done on an app called Paper by Fifty Three (Paper53) and can be found (free) in the Apple App Store.  I find it very user friendly and have a blast with it.  You can use it on your phone or iPad (I mush prefer my iPad) and all you need is a stylus (purchased, or you can often get them free from companies as promotional items) or even your finger!

Here is just a sampling of a few of my creations on my iPad.  The possibilities with this app and what you can do with your work after is quite fun and of course creative!


This next one is one of my faves! Using a variety of brushes within the app I created a pretty sweet one inspired by the styles of  Jodi Ohl and Jane Davies.


This one is again inspired from an earlier art journal page I did back in 2015 that I had seen on Pinterest...if I ever find it again, I'll be sure to give credit!!


Another Jodi Ohl inspired piece...


This one is taking the image to PhotoShop and creating layers, cropping and editing like crazy simple to create something new!


All of these can be simply printed off and added to collage/journal pages!  Easy peasy...right?!
To simply think you can take photos or scans of your own work and add them to another project is simply genius.  So a tip that is told by many an instructor out there, take photos/scan along the way and using these images for other purposes is an easy way to get more out of your own work.

Similar to the above image, layering your work over your photos is even cooler don't you think?!

Traci offers many classes (most are online now), you can check her out in the link provided.  The wonderful thing about Traci's style of 'teaching' is that she truly encourages you to find your own style and not having to have all the bells and whistles to find it.  Her knowledge is grand and teaches a vast area of art, journaling and playing!

She has three books (highly recommend) 
Collage Unleashed (2006)
Doodles Unleashed (2012)
Printmaking Unleashed (2014)

All available in print and digitally.


Next came some doodling on my part!  I pulled out a journal I had in my ever growing stash of them (you can never have enough, right?!).  I started in a book I had bought well over a year ago simply because I loved the pages as much it is called Walls Notebook (I posted a bit about it back in early January on the W2 FB page).  This journal is all doodled using my handy Sharpie fine tip (aside from one page where I tried to use my Koi Watercolors Brushes).


Then I got sidetracked and thought wouldn't it be cool to make my own?  Heck, there are a ton of these papers out nowadays! Heck, I have them in the shop!  This particular set is located here.  I have this one cut down to 6x12".


Scored at 6"


folded...


The pack allows you to create 4 signatures of  6 sheets for a total of 12 pages per signature.  My plan is to stitch the bindings and put them into either a hard cover book or maybe make a different cover...this is yet to be determined! 


And now back to more doodling...


Fun isn't it?!  I look for inspiration all over the place - could be an artist I follow on IG, FB or even blogs!  I also get inspiration from stencils! Stencils?! Yes, stencils! It is amazing what you can get inspiration from - try just looking around, look for patterns, shapes, colors - it is all there, right in from of you!

Another journal I use is a grid lined one and have doodles some fun stuff simply using a disposable fountain pen!  I have tried to keep this one more botanical - that is fun for me.  I really enjoy these type of images and am always looking for inspiration on these.

Here is a sampling from the journal...


Think that is enough photo overload fro you for today!  Will be back tomorrow (I promise) with more photo and inspiration overload!

Don;t forget to follow me on Facebook @w2scrapbooking and on Instagram @W2SCRPBK for more (active) posts, I'd love to see you over there too!

Be sure to see what is new (or on sale & clearance) over at the store here!

That Other Neutral Triptych

  That Other Neutral Triptych wrapped canvases 10x10x1.5" (x3) professional grade artist materials I worked on this smaller series at ...