Showing posts with label how to. Show all posts

Thursday, July 7, 2016

Thursday Inspiration....

If you follow me on Instagram (@w2scrpbk) or Facebook you will have seen some of this already, but I am going to go through it a bit more and give the details on where you too can create this style of journal.

I have followed Roben-Marie Smith for many years now and she never ceases to inspire me as I am sure you too will find out once you take the time to scope her out!  When she was unrolling her new site, she made a generous offer to provide one of her previous workshops - Urban Journal (Re-Mix) free to anyone who simply signed up for an account (free) on her new site. Here is the link to that offer.

Roben-Marie can be found here: site, blog, instagram, facebook, pinterest and I am sure loads more places if you looked!

Here is my take on her journal workshop.

Originally I have went to our local thrift store in search of an older book that I could dismantle accordingly - I did find one, not exactly what I was after, but thought I could make it work. Then....
the pot of gold at the end of the rainbow appeared....that being Glenda Schoepp-Drake of Boozybear!  She gave me a call on her way home from Edmonton asking if I could make use of some old encyclopedias....ah, YA!!

And the fun began....

I will just give you more of a photo based post here on my project as you really do need to head over to Roben-Marie's site to get your FREE entrance to the workshop (it's the right thing to do)!

I did mine very similar to Roben-Maries, but did make some changes in the fact that I mixed up the type(s) of papers I used when making my signatures.  I had wanted to keep a few original signatures of the book...


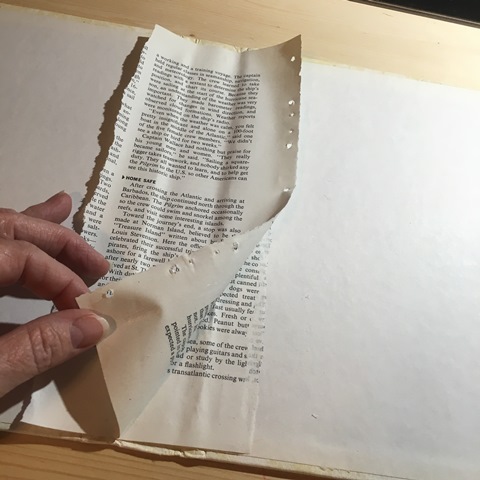
...until I came across these bad boys! Industrial staples! UGH!! 


So off I went to (hopefully not) destroying my book guts.


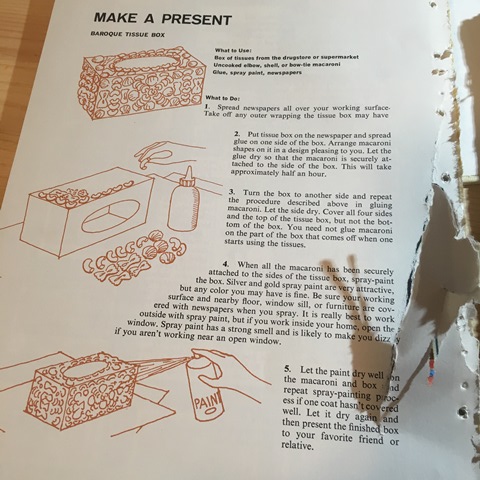
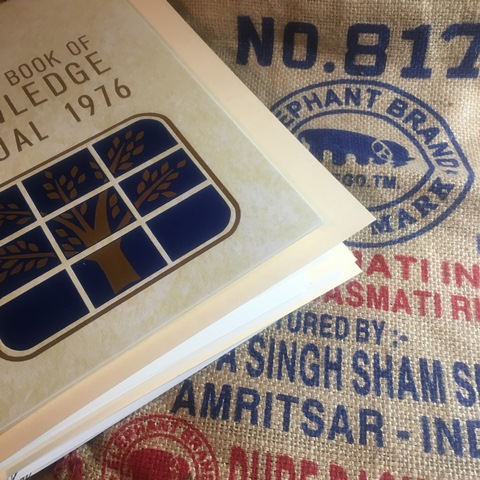
This encyclopedia is from 1976 (actually 1977) and I really got a kick out of some of the artictles!  Check out this one...


My first set up of the signatures was all the same paper substrates in the same signature, four sets of six. That changes soon as I try desperately to figure out how to get other substrates in there.


You will see that the pages are larger than the book - that's okay with me, you can cut to fit if that drives you crazy.  I happen to like the look.


Here is how the spine looks once you have stitched them all in.  In my case, four signatures. 


I ended up mixing up the paper substrates.  I have four signatures, three with four signatures and one with three.  I ended up making a fifth paper substrate using pages from the encyclopedia.  I double up the pages so they would be able to stand up to the application of paints and such.


Next comes the cover...

I have been hoarding this burlap bag for probably 5 years!  I bought that bag of rice strictly because of the bag!


attached a sheet of paperbacked canvas (paper side out) to the side of the bag I was going to attach to the actual journal.


only stitched three sides


as I wanted to incorporate the zippered pouch into the cover.


stitched across the back to create the pocket.  The second stitch was strictly for cosmetic reasons.  It just looked better when I wrapped it around the binding of the book.


I adhered the cover to the encyclopedia journal with Super Heavy Gel Medium.


Once gel was set, I cut off one of the handles (only because I should have done it before, but you know how ideas come sometimes. 


I attached it tot he back using my crop-a-dile and large eyelets.


There you have it!  I have already started playing in the journal and am really enjoying the variety of paper substrates to play on. Be sure to come back tomorrow to see what I have done with this weeks prompts for Weekend Junket!

see you soon, and thanks for stopping by!

Friday, July 26, 2013

Digital?

Many ask why digital?  I personally am not a 'digi' scrapper.  I like to feel and touch my textures - but that is just me.  I have seen many a layout that if I hadn't known better, would have thought it 'real'! So why am I even talking about this then you ask?  Well let me fill you in...quickly!

Digital Scrapbooking at DesignerDigitals

There is more to 'digi' than most realize.  I do indeed us digi files - just not necessarily always for the purpose they were intended for.  I like to either purchase and look for freebies over the internet (try Pinterest) and use the files for journalling tags and or embellishments.  My favorite place to purchase digi files is Designer Digitals. I usually go for the overlays, brushes and stamps as those are the ones I can make the most of. Don't worry if you don't have a photo editing program (ie. Photoshop) as you don't really need them if all you are going to do is simply print them off and cut/punch them out.  Most files are downloaded in .png and .abr formats and many have .pdf as well. The .png files you can copy and paste to a word doc and adjust sizing then simply print off on cardstock of your choice! You can choose to put multiple images on one sheet or several of one to cut out or even punch out with your favorite punch shape! Verses me going over every detail - if you want more information, please check out Designer Digitals "Getting Started" section as it is loaded with pdf how to's!

Some of my favorite designers are Ali Edwards and Katie Pertiet (both at Designer Digitals). They are definitely my 'style' and love using their images in scrapbooks, cards and projects alike! Best part about Designer Digitals is there always seems to be items on sale - this week no exception - 30% off until July 30 2013!

Won't keep you any longer as I am sure you are just as busy as me - I just wanted to plant a bug in your ear and let you know there is always something more out there!

Monday, March 5, 2012

Did you ever...

...just have one of those great ideas.  Well I know I have had a few over the years and as usual do nothing with it (them) and next thing you know...BAM...there it is  - showcased by someone else!  Well at least now I know it was a great idea cause good ol' Mr Tim has showcased it!

Check out the link to a video he has done showcasing honeycomb paper.  The sad thing is - or probably not overly surprising thing - he has done way better than I ever would have!  The man never ceases to amaze me!

See video HERE!

Get Honeycomb Paper HERE!  Stock is low right now, but more is due in later this week!  Loads of colors are available, don't forget to ink or spray to get the color and or look you are after!

While you are over at YouTube watching this video - why not check out some of his other videos, one never knows the inspiration one may come across!

Monday, November 7, 2011

Because you asked....


...cool - but what do you do with them? So I was on the Pink Paislee Blog this morning and voila - here you go!

Product Pick {Wood Shop Alpha}

This post is loaded with ideas using these letters - you will not be disappointed! Huge order arrived today, so am heading down to the shop to get it up on the site! Will post more later with the what's what...

That Other Neutral Triptych

  That Other Neutral Triptych wrapped canvases 10x10x1.5" (x3) professional grade artist materials I worked on this smaller series at ...