Saturday, June 7, 2014

More pages and a What If?

Here are some more images from my weekend at Crop Haven...

added color using Ranger Dylusions Ink Sprays (took lids off and poured small amount into palette tray) and brushed on with very wet paint brush. Colors I used were Lemon Zest, Vibrant Turquoise and Melted Chocolate.


sprayed with a very good amount of water to blend, closed the book to meld and then once dried - added some washi tape to continue with the linear lines


have had this stamp for a bit (Donna Downey She Is) now and really wanted to add it to a page, but wanted it done a bit different.  So looking around my table for some inspiration...ding!  What If....I stamped the image using wendy vecchi's translucent embossing paste?  Why Not?!   


Here goes nothing....


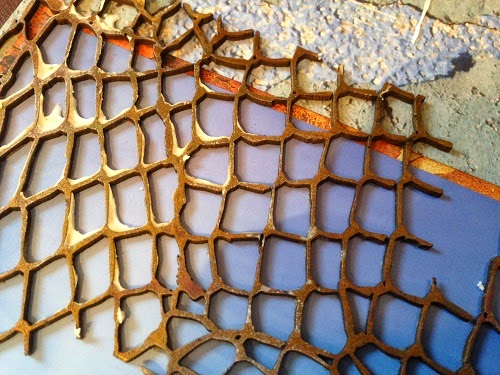
Since I was going to have to wait for it to dry (probably over night) I decided to use my new Dina Wakley Stencil Affirmations over top of some good ol' drywall mesh (you know me, never enough texture).  This time around I used Wendy Vecchi's Black Embossing Paste (vs the usual of me just mixing black paint with modeling paste).  Not sure if I can really tell the difference in the result, but did like it - as you can see, I did over apply it in a few areas, but I am ok with that.


Here is the result the next morning...well not quite as I added more Lemon Zest & Vibrant Turquoise and then water over the stamped image so to bring it out (I actually tried first to ink it, epic fail) - this was my attempt to fix it!


after adding some gelato to the edges, I can live with it now!


Next page was a fun one!  I decided to create a background with 'paper' for a change as I hadn't done that in a while.  I dug through my tickle tote of paper goodies and came across some old House of Three  embellishments - tickets! I prep'd the page with Golden Gel Medium, started tearing tickets and sticking!


so not to keep things too 'normal' decided to change things up a bit and put the tickets the opposite direction on the opposing page!


Time to add some color...


colored the entire opposing page. Since I used gel medium, I was able to easily wipe off some of the paint through my Tim Holtz Laying Stencil Numbered with a baby wipe.


you can see on the hexagon side that I added some dark brown (some Studio Calico Mister Huey's Classic Dark Calico).  The hexagon is cut randomly from a sheet of Jillibean Soup Placemats White Hexagon.


once it was all adhered down, I added some stamped images from the House of Three stamp set Parisian Anthology.  The 'die cuts' are cut from the ephemera pack of the same series.  I of course had to add some black gelato to the edges!


Here are some close ups...


Thanks for stopping by....


Thursday, June 5, 2014

Another weekend...another creative retreat!

A few weekends ago I got a chance to go to Crop Haven on the Base here in Cold Lake.  This monthly weekend crop is hosted by the MFRC on Base and they put a pretty good show!  Lots of space, lots of fun and lots of creativeness floating around!

I started off Friday night doing a challenge with a friend of mine from another community that of course could not come (boo), so we simply did it via iPhones!  I challenged her to do a page from a class we have been taking online but not 'copy' her page, just the techniques.  Here are the results...


I prep'd the page using my handy palette knife and gesso of course lightly and roughly.  I grabbed one of my old books and tore out a couple pages and then tore them into pieces randomly.

I adhered the pages using Gel Medium and did not adhere them down totally, just the tops so the bottom halves flopped in the wind (the music sheet is adhered totally)!


Now comes the fun part - I used modeling paste to create texture and 'hold down' parts of the bits and pieces of paper


To add more texture and flow, I added a strip of Prima Finnabair Elementals Borders #3 


Continued adding some Modeling Paste, this time to add the die cut shape of Tim Holtz Alterations Umbrella Man and some washi tape of course!


Now time to add some color....Golden Glazing Liquid mixed with Gelato!


randomly swipe it onto the page using your palette knife.


Here are a few close ups...
a few stamps here and there...


traced umbrella man...


added some more texture and another focal point with Tim Holtz Alterations Die Garden Greens (inked and sprayed with various Tim and Lindy's colors) 


of course need a few splats..love those Lindy's! Also used another Tim Holtz Collection Stamp to create a title.


Here is the final result!


Thanks for stopping by!


Wednesday, June 4, 2014

A Perfect Weekend Retreat...

I know I am playing catch up - but at least I am posting (right?)!  The following layouts are from the May 2 weekend I spent at Bittern Lake Lodge.  This is a retreat I go to every November and the first time I have been able to got to the spring one - what a difference going in the spring verses the usual 4 feet of snow (or was it?)!

Arrived Friday afternoon to a beautiful view and the creative juices were going (once all the visiting was done)!
Friday arrival....

Saturday, Good Morning?!?!


Decided to work on my pocket style scrapbook, I do it a bit different than everyone else (surprise surprise), as you know I do various size pages in my 12x12 Ring Album (12x12, 8.5x11, 8x8, 6x6, 11x8.5") so I have carried that over to my 'pocket style' pages (12x12, 8.5x11, 8x8, etc) and mixed them in with my original various sizing....pretty cool outcome!

Here I started out using a Project Life Pocket  Design G (10x12") Page, my inserts are from the Kaisercraft Captured Moments Base Coat  3x4 and 4x6" Cards.  I also stayed with a bit of a theme this time around which is so unlike me, but hey - always trying to switch things up!  So my 'theme' was using Kaisercraft Base Coat (everything)!  If you notice, I have used different sized photos inside the pockets as well.  This one has an 8x10" cropped down to work in the pockets (so love how it turns out).


Here is another Project Life Page (12x12") Design D
One thing you will note as well is that I never just leave the card 'as is' since I have a hard time letting go of the creative process of scrapbooking.  By jazzing up the cards, whether it with stamps, inks, washi tape and or die cuts - it makes me feel like I am doing something with the creative process and it is not simply sliding in a card and sometime journaling on them.


Project Life (12x12) Design B


This next set is from We R Memory Keepers Multi Pack and the page has 3 - 2x4, 3 - 4x6 and 2 - 6x4" pockets.  Again, here I used a larger photo and cut and cropped it to fit into the pockets.


Here is the standard Project Life (12x12") Design C.  My photos were printed off in 3x5" format so I could put them onto the onto 4x6" patterned sheets of paper and added some die cuts and stamps to make them just a bit better.


Now I am back to a good ol' 8.5x11", American Crafts in this case 


Back to Project Life (12x12") Design B 


Project Life (6x12") Design H.  On the next two layouts I used my Tim Holtz Frameworks Dies either on the photo itself or on the embellished paper. 


Back to 8.5x11 again....


Now a 12x12"!  Now that is a shocker!  So love how these ones turned out!  Added some Dusty Attic Fish Net Chipboard (12x12")  and messed it up with some Modeling Paste and Old Paper Distress Stain to age it.  Then I also added some more Modeling Paste using a Crafter's Workshop 6x6" Stencil (I think it was called Sketch Grid)


Another 12x12", this one was inspired by an Art Journal page I saw in Pinterest.  I used paper strips, washi tape, filmstrip ribbon and gaffer tape.  Stamp in the background is Kaisercraft Textured Stamps Numbers, and then some added embellishments of Tim Holtz Remnant Rubs Elements, Twine, Maya Road Vintage Findings, 7 Gypsies Reinforcers and Prima Wooden Icons in a Box Borders.


Here are a few close ups...
I layered a 5x7" with a 4x6" of the same photo and used pop dots to give it a 3D look.


Back to Project Life (12x12") Design K


Now I am playing on an 11x8.5" and used Modeling Paste, Time Holtz Frameworks Die, Distress Paint and Lindy's Stamp Gang (Blue & Green)
 

The reverse side is some fun! Dusty Attic Chipboard Chicken Wire and Jillibean Soup Placemats Hexagons inked up with Lindy's Stamp Gang Sprays Turquoise and Distress Inks n various colors. 


Having some real fun using Wendy Vecchi Transluscent Embossing Paste on the Base Coat paper with a Kaisercraft 12x12" Stencil Bricks then inked it all up with some Lindy's!


This 8.5x11' layout turnout out great!


The reverse of the above, again using modeling paste and templates; washi tape and such 


The last 'layout of the weekend was a Project Life (12x12") Design Design F.  Once again I used larger photos and cropped/cut them down to fit into the pockets.  One of my favorites is the bottom photo (first photo) where I tweaked a panoramic photo into 3x4" photos making it a 4x12"!


Thanks for stopping by!  

That Other Neutral Triptych

  That Other Neutral Triptych wrapped canvases 10x10x1.5" (x3) professional grade artist materials I worked on this smaller series at ...