Showing posts with label decoart. Show all posts

Sunday, February 19, 2017

Inspiration Overload

As promised, I am back with more inspiration of what I have been doing over the last couple of months, here goes...

I have been taking more of Traci Bautista's workshops - this one was part of her Mixed Media Lab that I am part of.  This particular one was for the Art Journal section where we simply played with stencils as a 'starting' point.  I put my stencils on one side of my book, sprayed with a mix of green sprays (Dylusions, Lindy's & Adirondacks) and while the right side was still wet and stencils were STILL on the page, I closed the book therefore transferring the images perfectly to the opposite page!  Stencils used for this are from my StencilGirl stash.


What you are not seeing here is what I do next - that I will save for another day (giggle)!  But think marks, doodles, and a lot of color!

There is usually a theme that we are encouraged to go with for each lesson, and as you know I have been on a botanical kick for a while so that is what I was going with here - and continued on to with the next project.

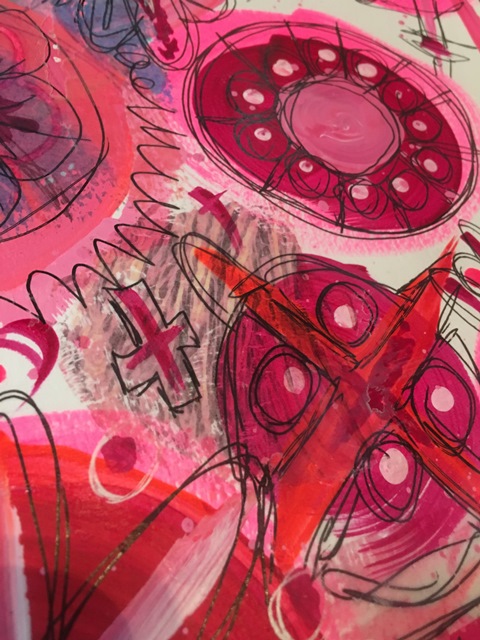
We had been asked to take photos when we were out and about - I went into my yard and took some great macro shots and my usual oddities.  The one I decided to use as my inspiration for the sketching part of our lesson was one of my oddities - where the grave met the grass (think fall/winter, but with no snow of course).  
The point of these lessons are not necessarily to copy the image, but to take inspiration from the shapes, colors, patterns and such YOU see within these photos.  One of the ways of creating something different is to use more than one pen/pencil/marker at a time.  I bound three of  my Stabillo Woody's together in some muted colors and doodled/scribbled some shapes.  I would then go in after with a finer pen or marker and add to it.  The possibilities here are endless and you can go for days on the same image and find something new simply by turning the photo or even the sketch (or both) and continue on.  It makes you think and also opens up your mind to new options.


There is so many options available to playing with your own art.  When you brainstorm with others, or simply let your imagination go wild it is amazing what you can come up with.

How do you brainstorm? What do you brainstorm? What triggers an idea or project for you?
For me, mostly it is by color &/or shape.  I know that is a tad odd, but hey - I get inspired differently than most and my interpretation of something is often quite different than most.  That is okay, and you too should be okay with how you interpret anything - that is what make it yours.

Some of my best brainstorming comes from something I have seen or read and then I start writing notes and ideas and then all of a sudden there is so many ideas flying out of my pen I have a hard time keeping up!  I write, I write and I write some more.  I have many many notebooks and written journals full of ideas and projects.  What do I do with them all?  Well, as the time allows or when the urge strikes... I implement them.  Some turn out to be fabulous, some are epic fails.  I am okay with either - at least I tried.  Never take a fail as a waste of time or product.  It is something that you learned from and can either better or abandon...it is totally up to you!

I took photos of a couple of my pages and thought it would be interesting to see how they image transferred back onto the original page.  Not only did I use the same images, I added more (myself) as well. This did not turn out as good as I had seen it in my head, but hey...I tried!  I used Golden Regular Gel Medium Matte for this process.


I continued to doodle and sketch over the transferred images to mimic the patterns below.  They still need more work, but as usual - for now, I have turned the page!


Next I went back to some of my Donna Downey 48 Weeks lessons that I really haven't done much with over the last year (plus).

I believe I was just bored as I was was in such a learning groove.  I would say I reached my end this year and have come to terms that I now just need to take what I have learnt, researched and implement it. I set a goal for myself to continue through this course and do as many pages that INSPIRED me.  If there were ones I didn't like - simply watch the video and take what she did and do it in way that inspired me!  There are a couple I have done...

This one is a collage piece that was pretty simple to do - Week #8.  Basic collage added to base, Gesso in 'strategic' spots and add black.  I chose to add red (Gelato) as well as I felt it needed it.  Really like how it turned out.


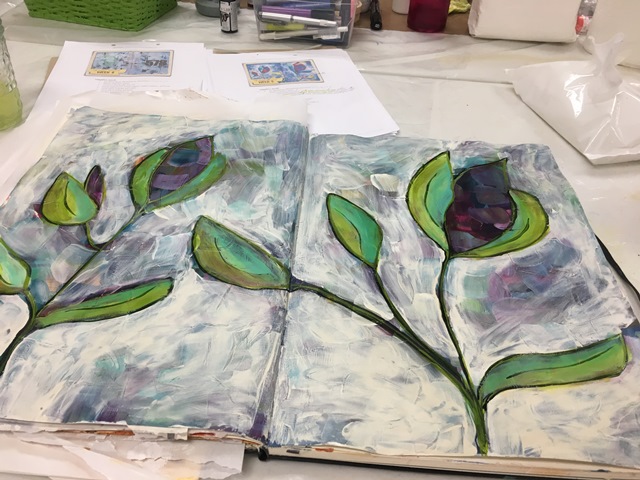
 Week #9 - created a base with acrylic paints in muted tones.  I then used a vine charcoal to sketch out the flowers/buds and then used my paint marker to fill in the lines.


I then messy brush stroked & finger painted in a mix of white gesso and titan buff paint around the sketch.


Added more acrylics (green gold & teal, blended with white gesso along the way) to the  image to create a defined shape & image.


Applied a Glaze coat. 


As you can see I did not put too heavy of a coat of any paints/glazes as I really wanted the base to come through.  I used Golden Paints on this spread as many of the colors used were transparent. 


You can use what you have on most projects - just take into account that you may not always get the exact results.  Which in my books is a good thing - it makes it yours!  Never be afraid to use what you have, you can always make it work.

Colors used: Golden Fluid Acrylics anthraquinone blue, permanent violet dark, diarylide yellow, teal, ultramarine violet, paynes gray and sap green hue. DecoArt Media Fluid Acrylics: green gold, phthalo turquois, quinacridone magenta, titan buff and quinacridone violet


Week #11

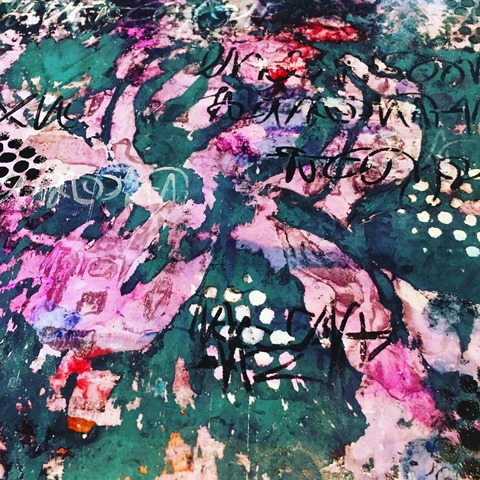
Starting with a collage based (textured wallpaper) and painted over.  I did a lot of free style painting here and although it is not the greatest, I am happy it is done and did enjoy the company I had doing it! Note: most of the painting was done with a finger or two!


Golden Fluid Acrylics & DecoArt Media Fluid Acrylics used: teal, titan buff, cobalt turquois, phthalo turquois, paynes gray, green gold, quinacridone magenta, cadmium yellow medium hue, vat orange, burnt sienna, quinacridone red, anthraquinone blue, sap green hue, indian yellow hue, quinacridone nickel azo gold, permanent violet dark, ultramarine violet, diarylide yellow, and carbon black.

Wednesday, August 31, 2016

More Summer Inspiration (hope you brought coffee & a snack)!

Remember a blog post back in July that told you where I get my inspiration?  Well this was an afternoon of fun playing with homemade collagraphs! 

What are collagraphs you ask? Well, basically they are homemade short-term use printing plates!  The idea came from Dina Wakley in one of her videos from Artist Network. She uses Ranger Shipping Tags (you decide on the size you want to work on).

I made four this day, did some free hand cutting, used my punches and simple adhered them using a glue stick.

I pulled out some of my new release Dina Wakley Heavy Body Paints and started plastering them onto a tag.  Once I was happy with the application, I laid a sheet of cardstock on top and brayered it  just like it was on a Gelli Plate.


I even repeated it a few times so I was able to cover the entire sheet.  Now I will use this in a future journal page whether as a whole or cut, punched or torn up!


I did the same on the other tags I created.


These are very easy to create and the possibilities are endless in my opinion.  We all have cardstock kicking around, heck you could probably even do it some of your old scrapbooking papers! Why not?!
Worth the try as I am sure you all the the items shown if not, check out the shop via the links provided.

Here is yet another cover up project.  This is a canvas I was attempted to 'blend' my acrylic paints with acrylic inks...ya, didn't do what I thought it would.  So cover it up I did!  I used Prima's Heavy White Gesso - this stuff is da bomb! Really love the coverage I got.  I applied it using my handy Stampendous Metal Palette Knife


Once it was dried fully (over night), I pulled out one of my Stencil Girl Stencils (Carolyn Dube Wall of Words L318) and put Light Modeling Paste through it. I wanted the entire canvas covered, so I had to strategically move it around and layer it over top of each other to achieve this.  But must say, very happy with it! So again needed to let this dry fully before going onto the next step. 


I pulled out some Hazel & Ruby Tissue Paper - Quote Collage (believe it is a discontinued item, sorry). I torn it up and layered it across the upper center of the canvas using gel medium.


Once this step was fully dry, I pulled out another Stencil Girl Stencil (Carolyn Dube Wall to Live by L209) and this time, used some Super Heavy Matte Gel being sure to stay on the tissue paper part of the canvas. 


The idea is, once it was dry, I would see the tissue paper print under the gel as it will dry clear.


Once it was fully dry (over night), I scrubbed a layer of White Gesso over the center of the canvas, only making sure the center was covered and not necessarily the previous modeling pasted words.


Once it was dry (enough-ish), I started added some Dina Wakley Heavy Body Paints in Magenta, Blackberry Violet and Fuchsia with a dry brush (Dina Wakley Media 1" Flat Brush


Now I wanted to blend the edges, so I used the same colors but this time added glazing liquid to each as I worked them all together. 


I let it sit for about 2 minutes, then I started to scrub across the center so I could see the tissue paper underneath.


Not sure if I really liked it at this point, but kinda went with it and thought I might need something more...


Used my Fineline filled with Black fluid acrylic and airbrush medium...nope, didn't like it.


spritzed it with water....nope didn't like it.


Started to scrub it off yet again using baby wipes.
This is where it stands for now - not really sure what I think about it.  Love the textures, just not in love with the finished result.  Pretty sure this too will continue on to yet another transformation!  Time will tell...


This next series is from when I had a girlfriend come up and keep me company while my hubby was away for a week. Most of these you may have seen a peek of over on my Facebook page.  Here are more details of each project...
I apologize now as it will be photo heavy!!

Started off with scrapping on a thin layer of gesso using an old gift card.  Then took a piece of an old sewing pattern (tissue) and slapped it down with gel medium.

Once it was dry, I doodled on random circles using my Uniball Signo Pen - Black (which is my fave by far). Then I used an oversized stencil and traced out the word Inspired.


Next, I pulled out my Prima Water Based Oil Pastels and colored the page! Yes, really, that easy!  I blended using my wet fingers. 


added a few doodles and scribbles again using my Uniball Signo pen. I think this page took me a whole 35 minutes start to finish! Sweet right?  Took inspiration from a post on Prima's blog.


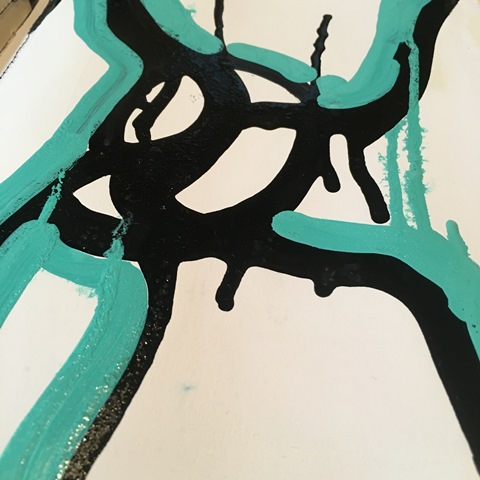
This next one...ya - hot mess! Catie had brought her KRINK's for me to play with.  Along with the stink and the crazy long drying time... I didn't get far! 


They have some serious drip-age without adding anything to them.  Just take forever to dry enough to actually do anything with them in a journal!  Guess that is why they were made for street taggers! 


After three days, I finally ended up covering it with gesso and that is where it stays for now!

This next one I thought would be a fun experiment.  I used a Dyan Reavely Dylusions Stencil  (Circles 9x12") and put DecoArt Media Crackle Paste trough it and allowed it to dry! 


Once it was fully dry - I started applying Dina Wakley Heavy Body Paints in Lemon & Sky 


Then softened it up wiping off some with baby wipes. Then added more colors (not shown) in Lime and Magenta


Next came a Stencil Girl Stencil (Traci Bautista Circles Circles L301) and applied black gesso through it.


This is a stamp from Dyan Reaveley called Write Between the Lines (DYR34544) 


I simply started stamping and doodling across this two page spread.  Used bubble wrap, stickers Katie had brought (I added and inked some more), and just let go.  Here it is now...


 Next came me making some of my own labels!  These are a matte finish that measure about 3.5x6" My apologies as I forgot to take pictures along the way! I used my DecoArt Chalk Finish Acrylic Paints and a boat load of stencils! Stencil Girl Stencils (by Rae Missigman), Tim Holtz, Donna Downey and Christie Tomlinson stencils too.


Next we pulled out the Yupo and Alcohol Inks.

What happens when you are tired, and add too much rubbing alcohol (or maybe is this scents they emit)! You see a sloth! 


I then added India Ink with a brayer and then started rubbing it off through a stencil. 


Not happy, that's okay, just rub it all off or in my case...layer on some more India Ink! If you look close, you can see the textures under the India Ink.

I pulled out one of the new Donna Downey Stencils - Iris to see what I could create.


Rubbed off the ink using a baby wipe.  Love how it pulls so much of the alcohol ink off too...gives it almost a watercolor look.


Now I started to go a bit crazy, but boy it was sure fun!  I added paint using a textured roller from American Crafts I picked up when I was in the states this past spring.


Used the same stencil, and offset it a tad and rubbed off the paint.


now I pulled out some Donna Downey stencils - Mini Number Repeat and Mini Alpha Rerun and again rubbed off some areas (some harder than others).


If I wasn't happy with an area, I would simply roll on some paint or ink and then proceed to rub off again through a stencil.  I even tried using the textured roller with rubbing alcohol and rolling it along the page to see what would happen (pretty cool, I know)!


Here I wasn't happy with how grungy it looked, so I rolled by brayer through some alcohol ink and went over the entire page. Then wiped off some making sure not scrub too hard as I wanted the color to still stain the piece. 


I then added more black paint through a variety of stencils.


This is how it stands now - I ended up adding some white through stencils too.  Like it, but now sure if it is done...or ever will be! 


Once last journal page for the weeks visit!

This one I did in my Moleskine journal (8x11.5") - missed taking photos again (sorry), but the page started off with using dictionary papers.  I then added layers of Dina Wakley paints using the dry brush effect.  I then added a few layers of colors through some Stencil Girls Stencils (Traci Bautista Flower Party L306).  You can see I have once again stayed in my go to Dina Wakley paint palette colors - Magenta, Sky, Lime and Yellow (there might be some Turquoise and Tangerine added in there too)!

I added a few punched circles of dictionary paper along the way and of course a couple more of Katie's stickers. I once again pulled out the Donna Downey and Tim Holtz stencils to add more layers.


I free hand cut some dictionary pages into the scalloped edge that is so popular. I also pulled out my coveted Christie Tomlinson stencil.


You can see I added a lot of everything to this spread.  There are layers and layers of stencils, paints, stickers, doodles and whatever else I thought to put on it!  It was a great page and love how it turned out.  Here is a sampling of the finished page.


Well, I think that is enough for today!  Hope you were able to stick with me to the end of this post!

You never know...I might be back with even more tomorrow!!

Note:  I have added links to many of the products available at the site, simple click on and it will take you directly there.  You can always start a Wish List and then process once you are ready.

That Other Neutral Triptych

  That Other Neutral Triptych wrapped canvases 10x10x1.5" (x3) professional grade artist materials I worked on this smaller series at ...