Thursday, November 29, 2012

Decorative Jar

Here is yet another project inspired by Stephanie Ackerman from her Homemade Christmas 2012 Class.

This was so fast and simple to make!  I am sure like me, you have a vast amount of jars kicking around the house (or your craft room)!  I did mine a bit different than hers only because I was running low on the Tim Holtz Ruler Ribbon so instead used the Creative Impressions Twill - Antique Ruler Ribbon.
Finished it up with knot and a Tim Holtz Trinket Pin, Muse Token attached with a 7 Gypsies Jump Ring and Making Memories Vintage Groove Antique Silver Lobster Clasp. The Jute Webbing around the jar is a favorite product of Stephanie's and lucky me - I too was able to get my hands on some!  I adhered the webbing to the jar using Be Creative (AKA Sookwang & ScorTape) 40mm Adhesive. The ruler twill is simply tied in a knot and the tie flaps are attached using Glue Dots.  Thinking it may need just a little something around the top - now to find what! Any ideas?
 

Here is a close up of the ribbon and charm!

Now the jar can be used for just about anything! Christmas candies, coins, or how about some craft items (buttons, brads, ribbon....).  I'm thinking some of those infamous Christmas tins that are taking up space may look pretty sweet wrapped in this Jute and filled with some Christmas baking!

Wednesday, November 28, 2012

Advent Inspired!

After looking at all the Advent ideas out there, I did what any 'sane' scrapper would do - make one!

I started on mine on Monday night, loved how it was turning out, but was not happy that it really wasn't Christmas enough for me!

The base of the project came from a class I bought via Stephanie Ackerman's Homegrown Hospitality Blog called Homemade Holidays 2012.  The Canvas itself is pretty cool I must say, but started to lose the effect when I added the clips. So what does one do....


  ....she heads off on another tangent!  Must say, liking this tangent!  Really, it took me about 30 minutes start to finish.

Here are a few close ups of the completed project.


made the poinsettia 3D by pinching the leaves with my index, middle finger and thumb to curl it and give it some lift.


Products used (25 Days of Christmas):  Prima 4x6" Canvas Refill Page, Seam Binding Tape sprayed with Ranger Adirondack Color Wash Meadow, Poinsettia made with Tim Holtz Sizzix Bigz Die Tattered Poinsettia, covered with Distress Stickles Rock Candy with some glitter mixed in; inked with Tim Holtz Distress Ink Pad Gathered Twigs.

Canvas covered with 7 Gypsies Collage Tissue Paper Paris, adhered and sealed with Ranger Glue n' Seal Matte, bits and pieces of paper from the Simple Stories 25 Days of Christmas 6x6" Paper Pad. I used a little bit of this and that when I came to create the background on the canvas - Tim Holtz Distress Stain Tarnished Brass, Ranger Adirondack Acrylic Paint Dabbers in Bottle and Cranberry, Adirondack Color Wash Spray in Meadow, Studio Calico Mister Huey's Color Mist in Classic Tan as well as some Tattered Angels Glimmer Mist in Meadow Green.

Prima Junkyard Findings Typo Bulb 1 adhered with Ranger Glossy Accents; clips are from my stash of office supplies I am trying to use up, but you could use Tim Holtz Hinge Clips too! I used Tim Holtz Washers and Long Fasteners to attach to the base.  The 'tags' are actual pages from the Simple Stories 25 Days of Christmas paper that I simply cut to size and inked the edges.  I also dded Tim Holtz Alpha Parts - Ransom numbers to each tag.

There are a total of 12 tags - one each of the numbers 3-9 and 0, two each of the number 1 & 2.  Thought about making a 13th tag with an additional 0, but then just said what the heck do I need a 0 0 for on Christmas Day!

The 'first attempt' products used:  Prima 4x6" Canvas Refill Page, Seam Binding Tape sprayed with Ranger Adirondack Color Wash Meadow.  Canvas is once again covered with 7 Gypsies Collage Tissue Paper Paris as well as some bits and pieces of paper from Tim Holtz Paper Stash Crowded Attic. Inked with more or less the same as the second but did add some Gesso.  Embellished with Tim Holtz Ruler Ribbon and some ScrapFX Chicken Wire Chipboard (inked with Ranger Jet Black Archival ink) from my stash. Chicken Wire was adhered to base using Glossy Accents.  Clips were done the same and this time I used Tim Holtz Journaling Tickets as the countdown source.  Just hadn't put any number on yet when I took the photos.

Let the countdown begin!

Advent Ideas

We have all done it - or at least want to - and there are so many out there!

Saw this one today over at My Craft Channel - Teresa Collins


this one I found on Pinterest and is so so cool!


Check the blog attached to this photo as there are several other great ideas there too!

then there is this inspiring one...


the blog is pretty good and worth the look

There are so many ideas out there - whether it be searched on google or even on pinterest.  The ideas are endless.  I have an idea that I am going to work on today....wish me luck!


Tuesday, November 27, 2012

Monday, November 26, 2012

just a little bit of creativity today!

finally got around to doing some creativeness today!  Didn't get as much done as I had hoped, but will finish it off later (really, I will)!


I have been very inspired by Stephanie Ackerman lately and have finally gotten the chance to work on another project inspired by her amazing creative journey she takes us all on!  This project is inspired by this post.

Here are a few close ups of mine, still on the fence about using the Tim Holtz Foundations Box Feet - what do you think?


Had a lot of fun making this - made a huge mess, but really like the results.  


until next time....

Thursday, November 22, 2012

Wednesday, November 21, 2012

She's Back!

She - being Kaitlin of Ormolu!  Many of you know just how much I LOVE LOVE LOVE her products!  She features a green philosophy and uses only recycled papers, soy ink and wind power to create her products. 

The shop is loaded back up with stock and just waiting for your creativity!  I plan on using a ton of it on my pages - so stay tuned for some layouts (yes, layouts)!  Her newest collection is No.25 - a Christmas based line that is totally amazing!


 The colors are rich jewel tones of red, grey mustard and black.


Head over to the shop now to grab what you can...

To see all the Ormolu that is currently in stock in my shop - check it out here

Tuesday, November 20, 2012

OMG OMG OMG!

Not to say the Lord's name in vain...but OMG!!!!! Oh my bleeping God! I am literally doing a happy dance (sorry for that image by the way)!

click on photo to link to the big news!

couldn't wait to share the news...this has so made my day!

This is a hot topic of contention amongst our scrapping circle.  I gave my girlfriend heck today cause she used one in a layout...how sad is that! Not to mention I used one last weekend in one of my projects...good to hear they listened to us all gripe!  Will definitely be putting a crap load of them in my CHA 2013 basket!

yeah yeah yeah! Anyone else as happy as me?!


Saturday, November 17, 2012

'Magnetic' Heidi!

Here is the last project I did at Bittern Lake Lodge last weekend.  This was my take on Heidi Swapp's Magnetic Closure Album.  The album design is very cool and simple to do, to see how Heidi made hers, head over HERE to check it out.

For mine, the base of the album was created using Medium Weight Raw Chipboard, Kraft 50 lb Cardstock Paper and Tim Holtz Kraft Resist Paper Pad.


I stained the papers using Tim Holtz Distress Stains; the cover Aged Mahogany and the inside pages Antique Linen.  I then inked the edges of the entire album with layers of Tim Holtz Distress Inks Gathered Twig and Walnut Stain.  I adhered the entire album using my ATG Gun.

Here are a few more shots to show you how it all came together.


Hope you enjoyed viewing these projects...now to get back to work and start working on some more!  Be sure to head over to Heidi's site or craft channel to get some inspiration of your own!

Friday, November 16, 2012

SMASH!

Here is yet another project I worked on while at Bittern Lake Lodge!  This one I more or less completed in one day!  Not a lot of descriptions that need to be said, so sit back check out all the photos and see if you get any inspirations....

 Decorated the front of my 'MOD Style' SMASH! Book with Tim Holtz letters cut out of his papers in the Destinations Paper Stash Packs.  Also used an old stamp of his - Journey - and stamped it onto some of new favorite paper, Kraft (50 lb) Paper and of course added some decorative Washi Tape from my stash!


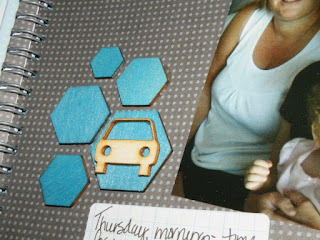
added flair to the page with the Studio Calico Stamp Roma, Studio Calico Wood Veneers Transportation, Crafter's Workshop 6x6" Stencil Splats, ink is Tim Holtz Distress Ink Pad Gathered Twig.


Loved this next one, didn't like the saying that was on it so painted over it with Claudine Hellmuth Studio Gesso (White), then added a strip of  wood grain washi tape to create a 'pole'!  On that pole I added Studio Calico Wood Veneer Flags - had to cut some of them to make them look rough (used my Tim Holtz Non Stick Micro Serrated Scissors).


To make it look like they were held on by nails, I used Ranger's Black Enamel Accents.


Here I did some ink splats - had to use a straw as I forgot my Pipettes!  Turned out pretty good I'd say!  The circles around the splat are made with White Gesso and a plastic cup and then I hand drew random circles with a Black Watercolor Pencil.


showcasing an array of washi tape!


oh look....more washi tape!


ya I know... more washi tape with an accent of  a one of the sheets from the SMASH! Pad.


here I changed it up by using a strip of Bazzill's Perfectly Pleated Newsprint with a little ink action.


letters cut out with Cricut (sorry, don't remember the cartridge).


House of Three (Pink Paislee) Ephemera from some old Daily Junque stash and of course the washi tape here is priceless...."Keep Calm and Carry On"


added embellishments with Birds on a Wire Washi Tape, some Adirondack Acrylic Paint Dabber Lights - Aqua and Studio Calico Wood Veneer People!


Heidi Swapp Color Magic Banner Delights sprayed with some Tattered Angels Chalkboard Spray I wanted to try out.


Now this one was cool to try too!  This is a new product I was introduced to on the weekend - Lindy's Stamp Gang.  Never even heard of it before...guess I have been under a rock!  It comes in a spray or dabber top (similar to Distress Stains).  It created an amazing splat, just what I was after.  So it got me to thinking...going to try this on some of my other inks and sprays...stay tuned!


hard to see here, but this is an insert page.


Really enjoyed making this book! My only complaint to K & Company is that they need to either use larger O-Wires or have less pages.  I really didn't add any bulk per say, but the pages are very tight!

Thanks for stopping by...see you again soon!

That Other Neutral Triptych

  That Other Neutral Triptych wrapped canvases 10x10x1.5" (x3) professional grade artist materials I worked on this smaller series at ...