This file folder mini was inspired by a pin on Pinterest - CandyCreates, and I kinda just ran with it from there! To see her version be sure to simply click on the link provided, she does an amazing mini!
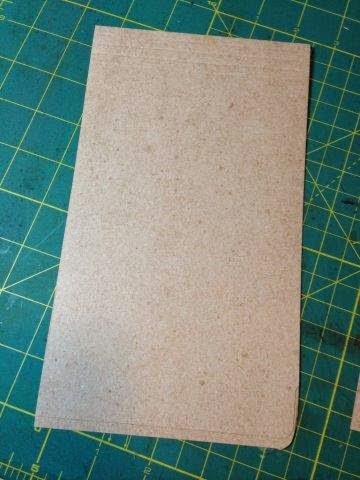
I used four (4) standard file folders and cut them down to 6.5", set the top parts off to the side for now as you will need them later. You will need one more file folder for an insert if you wish.


Fold over the already folder side of the file folder to the edge of the inside edge (non-tabbed), this should be at about 4 1/8". You will create a center peak as shown below that will become pockets.


Apply quality double sided tape (I used Provo Crafts 1/8" Terrifically Tacky Tape) on the edges shown as this will create your top pocket


Depending on how you choose to arrange your mini, will determine how you adhere now, I choose to have a tab at the front and back and then one more in the center(ish). So you will have to flip/reverse fold accordingly to get the order you want. When adhering together, I once again choose to create a pocket hence the layout of the tape shown below.


That is the basic assembly! Now comes the fun part...adding the paper!


You will have four (4) top pockets, I decided to make three (3) flaps and only one (1) of them for an actual tag. This is where you will use the left overs from the cut file folders. The flap measures 8" x 3 3/4". I have cut off part of the top as I did not want that much in the pocket, just enough to apply double sided adhesive and close it up. I didn't take a photo of it, but I did snip the sides that go into the pocket at an angle for ease. The actual flap that shows is 6" x 3 3/4". The tag for the top insert (no photo) measures 6.5 x 3 3/4".

Here is where you will use the fifth file folder, cut it down to size to fit into one of the pockets (6 x 8.5" at tab). This will go into one of the side pockets that you created. There will be three(3) side pocket inserts, this one and then I did two (2) simple tags. Each being approx 6 x 3 3/4". I say approx since it depends on your taping skills and how easily it will slide in and out, I simply trimmed mine to fit.

I had chosen to use the Marion Smith Designs Nirvana Paper Collection, and since so many of papers I loved both sides, I decided o simply use the file I had pre-cut only as a template and simply cut the sheet to fit (sorry for the blurry shot)!


There are a few sheets that have ephemera and tags that can be cut out...

so cut and inked (Tim Holtz Distress Ink Gathered Twigs) I did! I also distressed using my Tim Holtz Design Ruler (it was handy ok?!)

Here are some better shots of the the final project!


Thanks for checking it out! If you have any questions, please feel free to ask. All supplies can be purchased at the shop. Have a great day!
Find me on Facebook
Find me on Pinterest


