Friday, September 30, 2016

Weekend Junket #20


#w2wj20

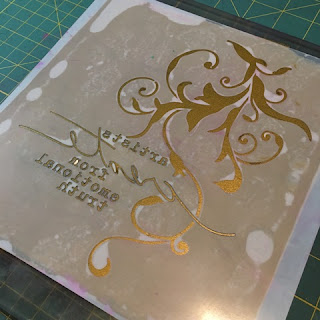
add character - image transfer
product focus - gold leaf/foil sheets
texture - fabric


Wow, can you believe we are on number 20 already? Hope you are enjoying this year of prompts.  This week I was really hoping to get the chance to do this set before hand but sorry to say I just didn't have the time. September has been uber busy for me and October is not looking much better!

On a happy note, a week of October is being taken up by my trip to Seattle (WA) to Northwest Country Art Retreat Center to take part in their Grand Opening.  Lisa is hosting Donna Downey where she will provide us with the Paint Like an Artist Workshop (October 6-9)!

** Please be sure to take note of the shipping notice on the site regarding this.  **

Now back to the prompts...

A couple tips that I have found when it comes to image transfers:

  • When using Inkjet printer - use Golden Reg Gel (Matte) for best results.  My best results have been when I apply the gel liberally (but not too thick) onto your surface with a brush.  Then I put the image down face first and lightly burnish it with your hand for about one to two minutes max.  I then slowly peel back the sheet to see how the image has transferred.  If it needs more time in that area, simple lay back down and burnish as needed until you can pull back the entire sheet.  I have have 95% success rate this way.
  • When using Laser printer - most other gels need to be dried fully and then sprayed with water and rubbed off to the point of loosing your finger prints.  If you choose to do it this way, more power to you! Having said that, if you are wanting a more crisp almost perfect image this is definitely the way to go.  I simply prefer a more vintage &/or grungy look.

Fabrics:

You can use whatever your little heart desires!  Perhaps you can channel Donna Downey and her love of muslin; perhaps pull out some of that Tim Holtz fabric you are hoarding; hey, maybe even grab an old pair of jeans and cut them up...totally up to you!  The important thing to note is how you are going to adhere it to your project page.  Again, depending on what your project plans are (or maybe you don't know where it may head), the heavier the fabric the heavier (stronger) the adhesive needs to be.  You can also staple it, use some of those 'vintage' brads &/or eyelets, just go with it - have fun!

Hope you simply let go on this one and have some fun with it!  Have a great weekend, once I am back I will blog all about my trip of course!  Until then....stay creative!


Wednesday, September 28, 2016

Always Looking, Always Researching...

I wonder sometimes if I should have been a lifetime student.  Then I think about actually going to school and then quickly shake my head and wake up from that daydream! I do love to learn and I really love to research - weird I know.

I am (almost) on the computer and web daily searching for something to inspire me, learn from, and then of course share with you.  More often I am looking for something that will not cost me an arm and a leg or my first born (he's the only one I have)!

Today on the W2 Scrapbooking & Mixed Media Art Studio Facebook page I shared another one for you.  So now I will share a bit more of what I found over the years of following (aka stalking) Julie Fei-Fan Balzer.


Earlier this year Julie Fei Fan Balzer started a new venture in her ever creative art(sy) world called Make it Artsy. It consists of a website, YouTube channel and Instagram account.  There are TV shows as well that I believe will be aired on PBS starting tomorrow (September 29 2016). I have yet to find it here in Canada, but I am still looking of course.  I did see on the site that there are DVD's available for purchase for Series 100 (13 episodes).  These episodes range from altered books all the way to metals and of course include art journal and mixed media projects too.

**  UPDATE:  Full episodes are on their website!  **

There are 4 DVD's for $39.99 usd (+ $8.00 usd for shipping to Canada).  Something to consider if you want full episodes. The thing about the YouTube channel is that it is only a part of the full episode found on the DVD's (or tv show I am assuming), but I am able to get inspiration from these and go with it from there. It is amazing how you can take inspiration from someone elses project and make it your own. Having said that, it is very important to state credit where and when credit is due - especially when posting online.

Other places you can find Julie are Scrapbook Soup and Balzer Designs.


Scrapbook Soup (previously known as Scrapbook Memories Series 100-1600) is a similar format as Make it Artsy. It's base is everything Scrapbooking of course. It is into it's fifth series now.


Balzer Designs is her website/blog.  On there you will find so much information you may need to be prepared to be there a while.   As you can see from the above graphic, there are links to her blog, podcast (with her mom, priceless), classes and her shop just to name a few. Julie is very artistic and is so full of creative goodness is oozes from her!

She shares loads of her creativeness (so much free) in Art Journaling, Stamp Carving, Pen & Ink, Stencils (which she designs for Crafter's Workshop) and so much more.  I find a handy part of her site is the Archives - makes for easy navigation.  You can find many of her blog series here along with easy link to her blog archives by categories.

Other places you can find Julie - Facebook, Instagram, YouTube, Pinterest and Twitter (@balzerdesigns).

Hope you enjoyed this post and take the time to head over to check out Julie's sites - I am sure you too will find some great inspiration along the way!

until next time...stay creative!


Friday, September 16, 2016

Weekend Junket #19


#w2wj19


color medium - watercolor
curveball - cover it up
inspired muse - seth apter


This week I am hoping to really challenge you to think outside the box and the product! You're welcome....enjoy! 

Sept Apter is a fabulous artist, designer, instructor and even an author!  I first discovered him on Instagram (@sethapter) and soon starting stalking him on his website, his blog and anywhere else I could find him (stencil girl stencils too)! Take the time to check him out, I know you will find him very inspiring as well.

My Take...

I actually got to working on this one too - I made a point of it...just for you! I started out with one totally different plan of action on this one and as usual I took a sharp left and another sharp right and ended up with one I actually like...imagine that?!?!?

Working in my homemade 6x12" journal, I prep'd the page with a coat of Golden Absorbent Grounds for Pastels


I decided to pull out my Koi Watercolors this time around as I knew I wanted to be able to really manipulate the wash.  I used my #12 Round Brush which has become a favorite (but thinking I want one even bigger)!


Spritz water on it as I wanted the added texture...


Okay, here is the first sharp left...


I allowed it to dry for several hours as it was quite thick.  Once dry, I took one of my new Stencil Girl Stencils (Corrugated Lines L276) and put Golden Soft Gel Medium Matte through it using my Palette knife


Now it needed to dry over night.  One thing you need to know about Soft Gel, is that there is some shrinkage and I find it is best if you apply thinly and somewhat evenly.


The next day, I first rubbed on some Dina Wakley Media Heavy Body Paint in White and tried to let it dry (operative word here). 


Yup, rubbed too much off...


Round two (okay, I fibbed, this is actually round three)! I found going back to my 'go to brush' really helped getting in between the lines of the stencil.


Now I am happy!!  I did let it dry for about 30 minutes and then went after it with baby wipes.


Really not overly happy as it being the end of it...I pulled out my Seth Apter Stencils from Stencil Girl (Story Time #L183 and Numbers #L184) ) and used my Sofft Art Sponges to apply Black Gesso through them.


I picked and chose what and where I applied the parts of the stencils to kind of make my own image(s).  It is important to know that the stencil does not need to be used 'as is' - be creative in you own way, make it yours and own it!


I really like it here, but thought that  it might be too dark now...


so I took a baby wipe or two and started scrubbing.  Might have scrubbed a tad too much, but I am kinda okay with it!


Make me think of worn out graffiti.


Thanks for stopping by, hoping to get more posts soon.  Been a hectic last week or so and you are all keeping me hopping.  Be back for the next installment of Weekend Junket on September 30!

Be sure to swing by the shop as there is loads of new product and much more on its way...you will not be disappointed!


Most products used on this art journal spread can be purchased at my shop and are linked accordingly for your ease.
store link

Also, don't forget to check out the Clearance section...it is loaded with sweet deals!!


Friday, September 2, 2016

Weekend Junket #18


#w2wj18

technique - glazing
texture - metal(s)
tool - found objects


What is/are found objects you ask? Well, literally, they are simply that - found objects! When you are out & about, in & around - grab an item (or two) that catches your eye and use it on/in your page/project!

Found objects can be a twig, branch, leaf, bottle cap, broken toy, glass tile, recycled item, junk mail papers, etc. Open up your mind and let your imagination and creativity take over!

Loads of inspiration out there - use the item as a stamp, a brush, a tool, embed it into your work. If you are stumped, google it! Sometimes it simply takes a photo or an article to spark your imagination...go for it!  For those of you that partook in my Mix Ur Media Kits last year, this would be a great time to pull out these kits (especially if you haven't even opened it).  January would be a good one to play with.

An artist that is amazing at using 'found objects' is Traci Bautista.  You can go to either of these two sites of hers...be prepared to get lost for a few hours - she is one talented and inspiring lady!

TreiC Designs (this is her newest site)

creativityUNLEASHED (original site, still loaded with info)


Once a Rebel...always a REBEL!

Once again I am behind the eight ball and have not had the opportunity to do this prompt ahead of time.  As you have seen in previous posts this past week I have taken a good part of this summer and made it 'all about me!' One would think that would have given me the perfect opportunity to do all these prompts...ya nope!  That would be 'work' as in I have to do it this way...I was just wanting to be rebel this summer...and I did just that! I did it my way and in my own time.

Hope you enjoy this one, see you back in two weeks with another set of prompts...maybe even a sample for some inspiration (one can only hope)!!

Thursday, September 1, 2016

Just a little MORE Summer Inspiration!

Are you tired of me yet?

I only have a few more to share with you, then  promise to leave you alone for a bit!

During my visit with Catie, a large shipment arrived to the shop - all the new Donna Downey Studios newest stencil release, Artistry Series!  Needless to say, I pulled a few to start playing with (yesterdays Iris one also one of them).

I once again pulled out my 6x12" homemade journal (made similar to the Donna Downey Inspiraton Wednesday Journal format ).  I roughly prepped a two page spread including the insert with Black Gesso.


Once it was dry, I pulled out the Cone Flower stencil.  I wanted to try two different paints to see how they would look on the black gesso'd base.  The first one was using Dina Wakley Media Heavy Body Paint in Fuchsia.  I used this on the petals, then used a mix of Elephant and Evergreen (obviously more Elephant) for the 'cone.'  The stem I used DecoArt Media Fluid Acrylic Interference Green.


The next one, I used everything the same except for the petals in which I used DecoArt (Americana Decor) Chalky Finish Paint in Inheritance (yellow).


Sadly, this is where these are still sitting - thinking I might want to doodle/scribble on them, but really do not want to do too much more on them.  I know they are 'flat' and could use some depth...but I am still working on that part of my painting.  I will get there one day...just not today!

INSERT IMPORTANT INSPIRATION NOTICE:  If you haven't been following along with Donna Downey (Facebook, Blog, Instagram), she had a phenomenal segment called Stencil Mania going on for the full month of August.  She had six designers/artists each do a set number of videos using certain stencils from this new release (there were 17 new stencils released in July).  Head over to her Blog or YouTube channel for all the inspiration and sharing!


This next was one I was attempting to actually do using prompts from one of the Weekend Junkets (#16 I believe).

I used my moleskine/canson sketchbook journal and prepped the page with a good coat of white gesso.  I took out a sheet of Kaisercraft printed paper from the Base Coat Series, this one was called Redwood. As I started tearing the sheet I got an idea of using the Tim Holtz Layering Stencil Woodgrain (THS023).


I decided to use some Super Heavy Gesso as I had an idea that I thought would be really cool...

I moved the stencil around the two page spread, overlapping where I could and trying to leave the center open where the torn paper would eventually go.


I adhered the paper down using gel medium, being sure to leave the torn edges exposed where I could.  Is it just me or does the paper not look like bacon?


K, now this is where the page goes a tad south....

I sprayed a mix of Stencil1 Ink Sprays and Lindy's.  I used mostly Stencil1 as they are way more potent and maintain their colors much better when dry.  


Can you say...blood bath?! Ugh, Ick, Yuck...take your pick!


Super Heavy Gesso to the rescue!


I made sure I put on a good coat, but also scraped along the previous stencil markings in hope to get more texture. 


Now I thought I might try an Ombre look, so out came the Heavy Body Acrylics.  Using my palette knife, I scraped on layer roughly of Liquitex Heavy Body Acrylic in Cadium Yellow Medium Hue.  Had to let it dry an hour or so at this point. 


Next came Dina Wakley's Heavy Body in Cheddar.  I repeated the same step as above.


Finally came the last color, DecoArt Media Fluid Acrylic in Burnt Umber.  I did not have a heavy body, so I simply mixed the fluid acrylic with some heavy gel medium.  Again, applied using my palette knife.


As usual, I am not happy with it, so a coat of Golden Absorbent Ground has since been applied to this page.  Beginning to sound like a bad habit isn't it?! More staining to come on this one!


Time for some fun! This next one was totally inspired by Denise Alloca's video from Donna's Stencil Mania.  I had some serious fun with it!

As usual, I pulled out my Dina Wakley Media Heavy Body Paints (simply my FAVORITE when printmaking).  As you can see I used a variety of 'pinks' (which seems to becoming a 'bad' habit of mine), Fucshia, Balckverry Violet and Magenta.  Spread it out using my brayer on the gelli plate.


First I laid out the Iris stencil then simply laid a sheet of white cardstock over top and burnished it with me hand.  If are not concerned with getting paint from your brayer (if you haven't cleaned it of in other words), you can use it...


I find I can often get two and even sometimes three images off one application of Dina paints on my gelli plate.  In this case, I just did two as I wanted the postive and negative image.  To get the negative, pull off the stencil then put a fresh sheet down, burnish.  Peel it back and look at your masterpiece!


Now I thought I might try something a bit different and use a single color and layer it onto an already printed image.  This is where it tends to get tricky as you need to somewhat line up the image and the stencil.  I did not want a perfect image, so having it offset was perfect.


Now I wanted to go even a step further, let's try a different stencil (or two)!  I chose to use Dina's Gilt (Gold) paint this time and Love LOve LOVE how it came about.

additional stencils used: Create Truth and Scribble Script


You can see in this photo how I sometimes only used PART of the stencil.  Masked off sections for certain transfers.  It was a blast as you can see.


That's it for today!  Don't forget tomorrow is the next round of  Weekend Junket!


That Other Neutral Triptych

  That Other Neutral Triptych wrapped canvases 10x10x1.5" (x3) professional grade artist materials I worked on this smaller series at ...