Sunday, December 30, 2012
Tags....what to do?!
Was doing a little surfing today and found this great article over at Get it Scrapped! This is a very informative site hosted by Debbie Hodge. Many will find loads of educational content there, also great for the more seasoned scrapper check out Masterful Scrapbook Design. There is tons of free info as well as classes and info that you may have to pay for - you decide! Head over there now and see what you too can learn today!
Friday, December 28, 2012


Monday, December 24, 2012
MERRY CHRISTMAS!

To you and your families I wish you all a very Merry Christmas and a safe and Happy New Year!
Thank each and everyone of you for the continued support over the last year(s), it means the world to me.
Here's to an even more creative 2013, looking forward to sharing many more with you all.
** Merry Christmas **
Thursday, December 20, 2012
Inpsired by....
...Stephanie Ackerman (still)!
Have finally gotten around to making some more Christmas ornaments! I had my friend Holly pick me up some different shapes of clear ornaments from Michael's a while back - here are some of the results!
They were a load of fun to make - easy peasy! I did several of them while talking to Anita on the phone (only one oops - right Anita)! They are all from Michael's "Celebrate it" line the first ones are a flat glass circle packaged in fours and retail here in Canada for $8.49 ($4.99 in the US). Thankfully she got them on sale, but still hard to take that they are almost double here in Canada!
I used 7 Gypsies Collage Paris Tissue Paper and crippled it up then distressed it using Tim Holtz Distress Ink Gathered Twigs, then stamped randomly with my Donna Salazar Chicken Wire Stamp using Ranger Inks Archival Ink (Jet Black). Adhered (and sealed) it all using Ranger Ink's Glue N' Seal (Matte). The hearts are simply white sheets of cardstock that I scanned with a book page and torn/cut out heart shapes. I first had inked them using Tim Holtz Distress Ink Barn Door then wanted them to be a bit more vibrant so sprayed them the Ranger Inks Adirondack Color Wash Red Pepper - turnout out amazing don't you think?! I inked the edges with my favorite Tim Holtz Distress Ink...you guessed it - Gathered Twigs! The word 'JOY' was added on top using Tim Holtz Alpha Parts Ransom. The other three I simple picked out three single words I found fitting for the season from the Tim Holtz Chit Chat Seasonal Sticker pack. All tied up with a bow using Hemptique Natural Hemp Cord (a new fav of mine too)!


These next ones are a square ball (is that an oxymoron?) once again from Michael's "Celebrate It" and are sold individually here in Canada for 2.89 each (ouch), but once again thankfully got them on sale! This time I used Tim Holtz Tissue Wrap Composer to wrap the balls. I added No.1 Shipping Tags inked up and stamped with the same as the first ones. The only other different product used this time around was the added use of a mix of Ranger Ink's Adirondack Color Wash Meadow and Tattered Angels Glimmer Mist Meadow Green. The mini tag with the 'naughty or nice' list was ones I had made awhile back using 7 Gypsies Christmas Greeting Stamp, Bazzill Cardstock in Red Devil & Kraft. Cut the topped edge using an old pair of pink shears and put it all together with a We R Memory Keepers Large Silver Eyelet.


 Well that is it for now! Not sure how much more 'time' I will have for creating the next week or so, so this could very well be the last post of 2012....only 'time' will tell! Have a safe and happy holiday season!
Have finally gotten around to making some more Christmas ornaments! I had my friend Holly pick me up some different shapes of clear ornaments from Michael's a while back - here are some of the results!
They were a load of fun to make - easy peasy! I did several of them while talking to Anita on the phone (only one oops - right Anita)! They are all from Michael's "Celebrate it" line the first ones are a flat glass circle packaged in fours and retail here in Canada for $8.49 ($4.99 in the US). Thankfully she got them on sale, but still hard to take that they are almost double here in Canada!
I used 7 Gypsies Collage Paris Tissue Paper and crippled it up then distressed it using Tim Holtz Distress Ink Gathered Twigs, then stamped randomly with my Donna Salazar Chicken Wire Stamp using Ranger Inks Archival Ink (Jet Black). Adhered (and sealed) it all using Ranger Ink's Glue N' Seal (Matte). The hearts are simply white sheets of cardstock that I scanned with a book page and torn/cut out heart shapes. I first had inked them using Tim Holtz Distress Ink Barn Door then wanted them to be a bit more vibrant so sprayed them the Ranger Inks Adirondack Color Wash Red Pepper - turnout out amazing don't you think?! I inked the edges with my favorite Tim Holtz Distress Ink...you guessed it - Gathered Twigs! The word 'JOY' was added on top using Tim Holtz Alpha Parts Ransom. The other three I simple picked out three single words I found fitting for the season from the Tim Holtz Chit Chat Seasonal Sticker pack. All tied up with a bow using Hemptique Natural Hemp Cord (a new fav of mine too)!


These next ones are a square ball (is that an oxymoron?) once again from Michael's "Celebrate It" and are sold individually here in Canada for 2.89 each (ouch), but once again thankfully got them on sale! This time I used Tim Holtz Tissue Wrap Composer to wrap the balls. I added No.1 Shipping Tags inked up and stamped with the same as the first ones. The only other different product used this time around was the added use of a mix of Ranger Ink's Adirondack Color Wash Meadow and Tattered Angels Glimmer Mist Meadow Green. The mini tag with the 'naughty or nice' list was ones I had made awhile back using 7 Gypsies Christmas Greeting Stamp, Bazzill Cardstock in Red Devil & Kraft. Cut the topped edge using an old pair of pink shears and put it all together with a We R Memory Keepers Large Silver Eyelet.


Monday, December 17, 2012
time flies...
....today marks 14 years for me with the business! It is the time of year I sit back and have a chance to reflect....

I have way too much stock!
My year end is quickly approaching and as many of you who have gotten to know me over the years...I despise inventory! When you see just how much I have, you too would not enjoy this time of year all that much! So after deep thought and much appreciation I have an announcement to make...
The entire store is on sale for 14 days!
scared you didn't I?
I really do not want to count it all and in hopes that you will help me out and take some of it off my hands - I in turn will give you 25% off your ENTIRE order (use discount code inv1214)! Wow, right?! If it is on the site - it is on sale!
** The 'small print' of the sale details: minimum order before shipping & tax is $35.00; all orders must go through the shopping cart; no pre-orders or special orders can be attached to these orders; there will be NO free shipping during this sale (aside from local pick ups of course); larger items may be subject to 'actual shipping' charges (as stated on its' description page). You must input the discount code inv1214 in the discount coupon box to receive your discount. **
Shipping dates during this sale will be done as soon as possible, but I will no doubt be at the mercy of the Post Office. With this being the holiday season, please allow for addition time in transit. If you get your orders in before noon (mst) I will do my best to get it out that day. There will be no shipping December 17, 24, 25 or 26. If you have any questions, please email me. I do have a very busy week ahead of me so if I do not respond to an email right away, please be patient, I will respond to you!
I wish you all a very Merry Christmas and Holiday Season. Thank you for all your continued support over the years, I look forward to many more creative years with you all.
Sunday, December 16, 2012
Inspired by....
Pinterest!
Was trying to get myself in the Christmas Spirit and came across this little gem of an idea at Maime Jane's.
The 6" ruler was something I found at Michael's about a year ago - just waiting for the perfect craft, glad I waited! They came natural and I simply stained them. For the first one I used Studio Calico's Mister Huey's Classic Tan; the 'scrabble' tiles are actually not 'scrabble tiles, but Wood Alphabet Tiles by Bottle Cap Co. and I stained them using Tim Holtz Distress Stain Barn Door; the tree is from Studio Calico Wood Venners - Trees (inked with Tim Holtz Distress Stain Bundled Sage). The entire project was then distressed using Tim Holtz Distress Ink Gathered Twigs. I drilled a hole using my hubby's drill press and then topped it with a 7 Gypsies Antique Brass Metal Reinforcer and finished it off with a good size length of Divine Twine Cherry. Adhered the tiles using TomBow's Mono Multi Glue.


On the second ornament - the tiles are stained using Tim Holtz Distress Stain Bundled Sage, the Divine Twine is Sour Apple that what colored a little bit extra with some random sprays. The Snowflake is from Studio Calico's Wood Veneer Snowflakes. The snowflake is painted with Claudine Hellmuth's Studio Gesso. Since Maelle has the 'snake bite' above her e, I simply used two black rhinestones to make her name complete! And since I don't know how to put those 'snake bites' above her e, I will have to continue to type it wrong (sorry)!
Be sure to pop in tomorrow for the big news....one more sleep!
Monday, December 10, 2012
watch for it...
...are you ready for it? It is almost that time of year again!
six more sleeps and it will once again be upon us!
December 17 2012 is the big day - bet you just can't wait for it can you!
Two glorious weeks of it.....
Thursday, November 29, 2012
Decorative Jar
Here is yet another project inspired by Stephanie Ackerman from her Homemade Christmas 2012 Class.
This was so fast and simple to make! I am sure like me, you have a vast amount of jars kicking around the house (or your craft room)! I did mine a bit different than hers only because I was running low on the Tim Holtz Ruler Ribbon so instead used the Creative Impressions Twill - Antique Ruler Ribbon.
Finished it up with knot and a Tim Holtz Trinket Pin, Muse Token attached with a 7 Gypsies Jump Ring and Making Memories Vintage Groove Antique Silver Lobster Clasp. The Jute Webbing around the jar is a favorite product of Stephanie's and lucky me - I too was able to get my hands on some! I adhered the webbing to the jar using Be Creative (AKA Sookwang & ScorTape) 40mm Adhesive. The ruler twill is simply tied in a knot and the tie flaps are attached using Glue Dots. Thinking it may need just a little something around the top - now to find what! Any ideas?


Now the jar can be used for just about anything! Christmas candies, coins, or how about some craft items (buttons, brads, ribbon....). I'm thinking some of those infamous Christmas tins that are taking up space may look pretty sweet wrapped in this Jute and filled with some Christmas baking!
This was so fast and simple to make! I am sure like me, you have a vast amount of jars kicking around the house (or your craft room)! I did mine a bit different than hers only because I was running low on the Tim Holtz Ruler Ribbon so instead used the Creative Impressions Twill - Antique Ruler Ribbon.
Finished it up with knot and a Tim Holtz Trinket Pin, Muse Token attached with a 7 Gypsies Jump Ring and Making Memories Vintage Groove Antique Silver Lobster Clasp. The Jute Webbing around the jar is a favorite product of Stephanie's and lucky me - I too was able to get my hands on some! I adhered the webbing to the jar using Be Creative (AKA Sookwang & ScorTape) 40mm Adhesive. The ruler twill is simply tied in a knot and the tie flaps are attached using Glue Dots. Thinking it may need just a little something around the top - now to find what! Any ideas?

Here is a close up of the ribbon and charm!

Now the jar can be used for just about anything! Christmas candies, coins, or how about some craft items (buttons, brads, ribbon....). I'm thinking some of those infamous Christmas tins that are taking up space may look pretty sweet wrapped in this Jute and filled with some Christmas baking!
Wednesday, November 28, 2012
Advent Inspired!
After looking at all the Advent ideas out there, I did what any 'sane' scrapper would do - make one!
I started on mine on Monday night, loved how it was turning out, but was not happy that it really wasn't Christmas enough for me!
The base of the project came from a class I bought via Stephanie Ackerman's Homegrown Hospitality Blog called Homemade Holidays 2012. The Canvas itself is pretty cool I must say, but started to lose the effect when I added the clips. So what does one do....


....she heads off on another tangent! Must say, liking this tangent! Really, it took me about 30 minutes start to finish.


Products used (25 Days of Christmas): Prima 4x6" Canvas Refill Page, Seam Binding Tape sprayed with Ranger Adirondack Color Wash Meadow, Poinsettia made with Tim Holtz Sizzix Bigz Die Tattered Poinsettia, covered with Distress Stickles Rock Candy with some glitter mixed in; inked with Tim Holtz Distress Ink Pad Gathered Twigs.
Canvas covered with 7 Gypsies Collage Tissue Paper Paris, adhered and sealed with Ranger Glue n' Seal Matte, bits and pieces of paper from the Simple Stories 25 Days of Christmas 6x6" Paper Pad. I used a little bit of this and that when I came to create the background on the canvas - Tim Holtz Distress Stain Tarnished Brass, Ranger Adirondack Acrylic Paint Dabbers in Bottle and Cranberry, Adirondack Color Wash Spray in Meadow, Studio Calico Mister Huey's Color Mist in Classic Tan as well as some Tattered Angels Glimmer Mist in Meadow Green.
Prima Junkyard Findings Typo Bulb 1 adhered with Ranger Glossy Accents; clips are from my stash of office supplies I am trying to use up, but you could use Tim Holtz Hinge Clips too! I used Tim Holtz Washers and Long Fasteners to attach to the base. The 'tags' are actual pages from the Simple Stories 25 Days of Christmas paper that I simply cut to size and inked the edges. I also dded Tim Holtz Alpha Parts - Ransom numbers to each tag.
There are a total of 12 tags - one each of the numbers 3-9 and 0, two each of the number 1 & 2. Thought about making a 13th tag with an additional 0, but then just said what the heck do I need a 0 0 for on Christmas Day!
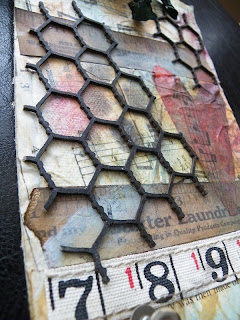
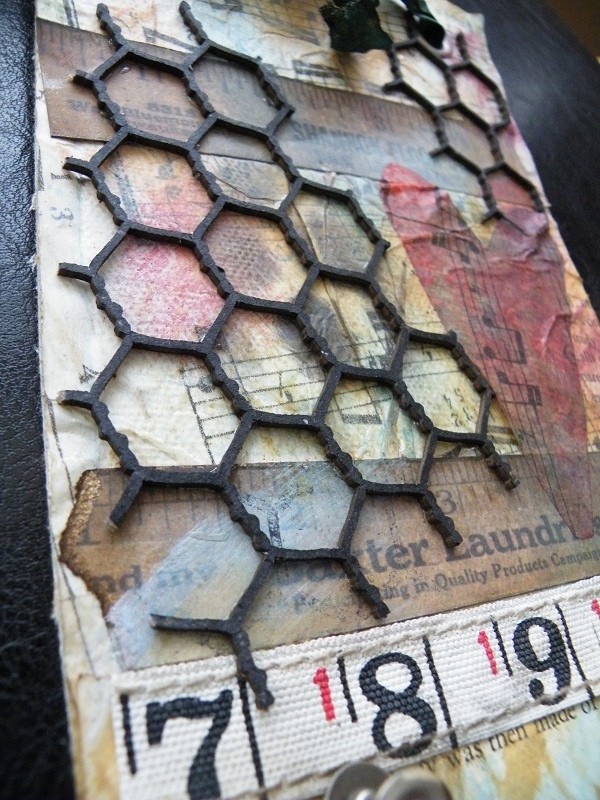
The 'first attempt' products used: Prima 4x6" Canvas Refill Page, Seam Binding Tape sprayed with Ranger Adirondack Color Wash Meadow. Canvas is once again covered with 7 Gypsies Collage Tissue Paper Paris as well as some bits and pieces of paper from Tim Holtz Paper Stash Crowded Attic. Inked with more or less the same as the second but did add some Gesso. Embellished with Tim Holtz Ruler Ribbon and some ScrapFX Chicken Wire Chipboard (inked with Ranger Jet Black Archival ink) from my stash. Chicken Wire was adhered to base using Glossy Accents. Clips were done the same and this time I used Tim Holtz Journaling Tickets as the countdown source. Just hadn't put any number on yet when I took the photos.
I started on mine on Monday night, loved how it was turning out, but was not happy that it really wasn't Christmas enough for me!
The base of the project came from a class I bought via Stephanie Ackerman's Homegrown Hospitality Blog called Homemade Holidays 2012. The Canvas itself is pretty cool I must say, but started to lose the effect when I added the clips. So what does one do....


....she heads off on another tangent! Must say, liking this tangent! Really, it took me about 30 minutes start to finish.

Here are a few close ups of the completed project.


made the poinsettia 3D by pinching the leaves with my index, middle finger and thumb to curl it and give it some lift.


Canvas covered with 7 Gypsies Collage Tissue Paper Paris, adhered and sealed with Ranger Glue n' Seal Matte, bits and pieces of paper from the Simple Stories 25 Days of Christmas 6x6" Paper Pad. I used a little bit of this and that when I came to create the background on the canvas - Tim Holtz Distress Stain Tarnished Brass, Ranger Adirondack Acrylic Paint Dabbers in Bottle and Cranberry, Adirondack Color Wash Spray in Meadow, Studio Calico Mister Huey's Color Mist in Classic Tan as well as some Tattered Angels Glimmer Mist in Meadow Green.
Prima Junkyard Findings Typo Bulb 1 adhered with Ranger Glossy Accents; clips are from my stash of office supplies I am trying to use up, but you could use Tim Holtz Hinge Clips too! I used Tim Holtz Washers and Long Fasteners to attach to the base. The 'tags' are actual pages from the Simple Stories 25 Days of Christmas paper that I simply cut to size and inked the edges. I also dded Tim Holtz Alpha Parts - Ransom numbers to each tag.
There are a total of 12 tags - one each of the numbers 3-9 and 0, two each of the number 1 & 2. Thought about making a 13th tag with an additional 0, but then just said what the heck do I need a 0 0 for on Christmas Day!
The 'first attempt' products used: Prima 4x6" Canvas Refill Page, Seam Binding Tape sprayed with Ranger Adirondack Color Wash Meadow. Canvas is once again covered with 7 Gypsies Collage Tissue Paper Paris as well as some bits and pieces of paper from Tim Holtz Paper Stash Crowded Attic. Inked with more or less the same as the second but did add some Gesso. Embellished with Tim Holtz Ruler Ribbon and some ScrapFX Chicken Wire Chipboard (inked with Ranger Jet Black Archival ink) from my stash. Chicken Wire was adhered to base using Glossy Accents. Clips were done the same and this time I used Tim Holtz Journaling Tickets as the countdown source. Just hadn't put any number on yet when I took the photos.
Let the countdown begin!
Advent Ideas
We have all done it - or at least want to - and there are so many out there!


Saw this one today over at My Craft Channel - Teresa Collins

this one I found on Pinterest and is so so cool!

Check the blog attached to this photo as there are several other great ideas there too!
then there is this inspiring one...

the blog is pretty good and worth the look
There are so many ideas out there - whether it be searched on google or even on pinterest. The ideas are endless. I have an idea that I am going to work on today....wish me luck!
Tuesday, November 27, 2012

Monday, November 26, 2012
just a little bit of creativity today!
finally got around to doing some creativeness today! Didn't get as much done as I had hoped, but will finish it off later (really, I will)!

Here are a few close ups of mine, still on the fence about using the Tim Holtz Foundations Box Feet - what do you think?


I have been very inspired by Stephanie Ackerman lately and have finally gotten the chance to work on another project inspired by her amazing creative journey she takes us all on! This project is inspired by this post.
Here are a few close ups of mine, still on the fence about using the Tim Holtz Foundations Box Feet - what do you think?


Had a lot of fun making this - made a huge mess, but really like the results.
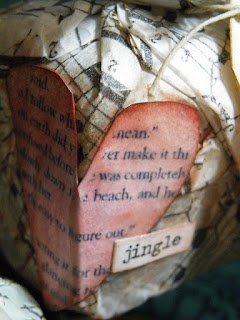
Products used: Tim Holtz Configurations Box 5.5x5.5", Tim Holtz Paper Stash Crowded Attic, Tim Holtz Distress Ink Gathered Twig, Tim Holtz Seasonal Chit Chat Word Stickers, Tim Holtz Label Pulls, Tim Holtz Tissue Tape Symphony, Ranger Ink Glue n' Seal Matte, 7 Gypsies Clear Apothecary Bottles, 7 Gypsies Primative Apothecary Labels and an old book I tore out a page from!
until next time....
Subscribe to:
Posts (Atom)
That Other Neutral Triptych
That Other Neutral Triptych wrapped canvases 10x10x1.5" (x3) professional grade artist materials I worked on this smaller series at ...

-
 Here is the next project I worked on - this is from waaaaay back in October! I started it at the last Tomahawk retreat. It is once again ...
 -
That Other Neutral Triptych wrapped canvases 10x10x1.5" (x3) professional grade artist materials I worked on this smaller series at ...
-
"The Neutral One" 24x24x1.5" wrapped canvas professional grade artist materials -acrylics This is my "I've lost co...

