Friday, May 27, 2016

Weekend Junket #11


#w2wj11

color medium - paint
product focus - stencils
tool - pouncer/mini foam tool


This set of prompts allows for a lot of freedom. Don't be afraid to think outside and beyond your tools and products.  Challenge yourself - you will be surprised and happy with the results.


Inspiration is everywhere, enjoy your journey....


**  Reminder - no prizes awarded for prompts #10 - 17  **

Here is my take...

I wanted to try and use everything Dylusions this time around.  Now, remember and understand that I do not follow rules very well...but I did try my best!

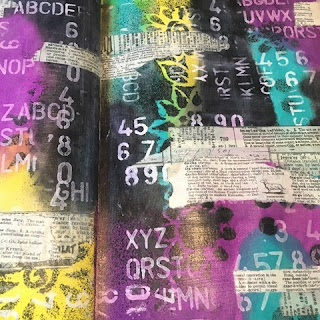
I pulled out four Dylusions Paint colors that I thought went good together and of course would provide a pop of color.  I used the Tulip Pouncers to apply the paint.


I pulled out some of my Dylusions Stencils Dotted Flower, Squares and Circles.  I sprayed them with a variety of Dylusions Sprays.  Then I wanted more pop, so I ended up pulling out  some Donna Downey Stencils Mini Number Repeat and Mini Alpha Rerun.  I first used the Dylusions Ink Spray in White Linen, as good as coverage I got, I wanted more - so I used the Dylusions Paint in White Linen. 


As much as I loved this as is, it of course needed more.  I started adding bits of vintage dictionary pages torn up along with some Tim Holtz Tissue Tape.  I adhered them all down with Matte Medium. I took a few extra steps here as I knew what I was going to do later.  I might have gone over board, but that's okay.  I sealed the entire page with clear gesso then matte medium.  Don't ask me why - I wasn't thinking the next step through the whole way! oops!!


Now this is where I kind of went off track.  I was trying to figure out a way to showcase areas so I went back in my brain and pulled out a technique taught in a Tracey Verdugo class called Paint Mojo.  I just took it a bit further by connecting the feature spots.  I created them using my Stabilo All Pencil (Black). 


Next, I took the Dylusions Paint, in White Line.  Used my Dina Wakley 1" Flat Brush, dipped in water then into the paint and brushed it on trying to stay 'outside' the lines. I was okay with getting that smear of the Stabilo All pencil, was kinda hoping it might just save me a step later! 


I went over the lines again once the white was dry(ish) with my Stabilo All pencil then blended it with a fine tip liner brush dipped in water. It really popped the black. 


Now I was stumped.  Surely I couldn't leave it as is, could I?!?  Ya nope!  Brain wave!!  If you follow The Documented Life Project, you will know that many of the ladies over there make their own stickers.  AND, Traci Bautista suggest that you scan images of your work and print them off to include in your journals.  So I kind of did both.  Anyone who has received a package from my, will note that there is sticker on there...doing just that!

I took on of the photos of this page and simply printed it out onto a sheet of Avery Labels. I just print off in photo mode on my printer as if it was an 8.5x11" sheet of photo paper as I will use all kinds of bits and pieces from it anyway.


This particular sheet is 2" circles.  So I used some of them then of course pulled out my scissors, a 1" punch and a 1/2" square punch.


Once I was happy with the placements, I scribbles around the additions using a permanent marker.


For now, I think I am done.  I might add one more step, but at this point...I'm calling it done!!

If I really thought I could use everything Dylusions....I was 'dylusional!'  Bahahaha, sorry...couldn't let that one go by without a comment.

Thanks for stopping by, look forward to seeing you around again.  Don't be shy, let me know you were here! 

Thursday, May 26, 2016

Some Inspiration on Thursday

Hi all - been keeping as busy as ever in the shop and the studio!  So happy to have made the time to play lately.  If you have been following me on Facebook &/or Instagram, you will have seen a few of these 'sneak peaks.'

I finally finished the one that I ended with in the last post.

I had an extra of this lady on my desk (getting in the way, and of course refusing to throw out), so thought this was as good as time of any to add her onto a page!  A trick when using printer paper or any other thin paper application, is to apply Fluid Matte Medium to the base page first, then to the back of your intended ephemera.  Place it down on top of your pre-adhered area and smooth out with either the brush or a straight edged tool (like an old credit/gift card).  I don't always do this as I usually don't have an issue with the wrinkles and creases you may get if you don't (it's called free texture)!


I pulled out some more bits and pieces of paper ephemera off my desk and simply started placing it down (as stated above).


As you know, I was able to get some of the Easy Joint Tape in the shop (not an item I can find in Canada, so had to bring it in from the states).  This stuff is AMAZEBALLS!  So versatile.  It is a sticky backed paper drywall tape that is similar to what is called punchinella in the sewing world.  Why is is cool you ask? Well is is instant texture for one.  With the peel away backing, you instantly double the amount of punchinella; also, the backing is similar to a kraft waxed paper so you are able to use is as a stencil too! The actual drywall tape is paper, so it accepts color fabulously.  Need I say more....?


I tore off about a 7 inch strip and used every bit of it on this journal spread. 

Now I added some Liquitex Super Heavy Gesso to bring the photo forward and take the backing back (I know confusing, but it does totally make sense in my head). 


Time to add some color.  I decided on using DecoArt Media Fluid Acrylics in Raw Sienna 


...then some Green Gold


I used the extra Green Gold I had on my palette and painted her dress. 

I used on of my Inktense Watercolor Crayons for the hair.  I then pulled out my Stabilo All Pencil  in black  to trace around the lady and to create shadow.  She is all done for now (I think)!


If you want to see more to this story...check out the short video on my W2 Scrapbooking Facebook page here.

I was working on a page for tomorrow's Weekend Junket, and came up with a brain wave...

I decided to use the prompts from Weekend Junket #10, here is the result of it.

I wanted to create layers of texture across the center of the page.  I started off using some of the Easy Joint tape across the page side to side, over top of it I added some mesh netting ribbon from my stash (an old Prima one that is discontinued), then added a layer of Light Modeling Paste through a Prima Stencil (Finnabair Elementals Dots & Stripes)


Next I used my Crafter's Workshop 4x4" Remnant Stencil (Radar) and put DecoArt Media Crackle Paste through it. I may have gone a tad overboard on a few of the stencils...but hey, now I know for next time.  I went on very easily, but I put it on too thick on a few of them, as you will see (why) in a few pictures coming up.

I used the excess pastes (crackle and modeling) on other areas of my page to create more textures.


Here is the radar stencil the next morning.  Some crackles were better than others.  The ones that I had way too much paste on, cracked large and had curled up.  I was okay with it as I had plans of course! 


I decided to use DecoArt Media Fluid Acrylics in Cobalt Teal Hue as I had some 'seepage' from another page so hey, why not!?!  I took a good amount of the teal paint and brushed it heavily over the center textures of the page.


Then I tilted up the journal and sprayed it with water and allowed it to drip down. 


Once I was happy with it, I did the same thing again for the top half. 


Now it was time to add a layer of glaze using Golden Quinacridone Nickel Azo Gold.


After waiting about two minutes, I used baby wipes and wiped off the glaze. 


Totally love love LOVE how this one turned out.  The Quinacridone Nickel Azo Gold over the Cobalt Teal Hue created a patina look, especially over the areas where the modeling paste was applied.


I wanted the drips to show more, so I applied more of the teal paint and used a very wet brush and again sprayed with water (same as previous).


I found it a tad too bright, so I added a mix of Faber Castell Gelatos in Black Licorice and Iced Coffee around the edges of the page, as well as the top and bottom of the center texture line.


Finally, I finished it off using one of Donna Downey Stencils called Create Truth. I used Black Gesso and one of my Tulip Pouncers after I masked off the flourish I did not want on my page.


Calling it done for now.

Thanks for stopping by, be sure to stop by again tomorrow as there will be the next set of prompts available for Weekend Junket, and maybe even some inspiration!

Friday, May 20, 2016

Friday Inspiration

Finally getting back into the swing of things, this cold really took it's toll on me aside from the daily grinds of life.  All is good in my world and I took time to get creative and work on some classes and just play.

I pulled out a class I signed up for over a month ago called 21 Secrets.  I really wanted something that I thought would be out of my usual realm of creativity and comfort.  I picked a doozer!

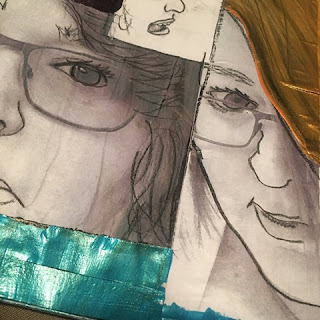
Without going into too much detail on the class itself, let's just say printing off pictures of yourself and putting them into a journal...ya, uncomfortable.  I am not used to being the center of attention.  But I will say, I thoroughly enjoyed it once I got going.

I started out in one of my Canson/Moleskine Sketch Journal and added a dictionary page to each side using Matte Medium.  Once that was done I applied some black and white images of myself again using Matte Medium in a collage style.


Once it was all dry, I used my All Stabilo pencil and (sketched) traced out the images 


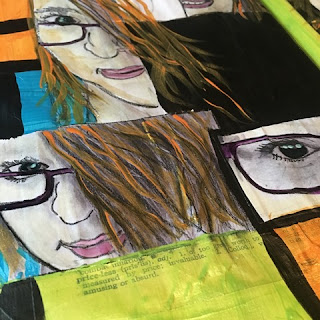
Then I started to color block with some bright colors - here I decided on Prima's Finnabair Art Alchemy Metallique Paints in Rich Turquoise, Dark Velvet, Fresh Orange and Lime Peel. 


I was finding it just too bright (and shiny), so added Black Gesso in some of the blocks as well as adding some lines to break it up. 


Next, I pulled out some Faber Castell Stamper's Big Brush Pens to start coloring some of the photos


For my hair, I also added the Finnabair Art Alchemy Fresh Orange paint along with the Stamper's Big Brush Pens.


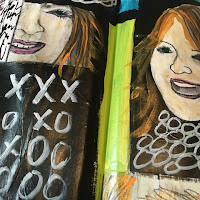
I added some doodling with the Fineline Applicator in Black.  The white doodling is a Liquitex Paint Pen.


Here is the finished spread.  So different from what I usually do, but must say a nice change and really enjoyed trying something a little different. 


The next one fro the 21 Secrets I worked on was one encouraging to open up and revisit classes you have not either finished or even looked at (yes, kind of funny)!  We are all guilty of it, I am no exception.

I used some stickers from my stash  (Heidi Swapp in this case) and built the page filled with words and thoughts that transcended from my feeling about the courses. The next part of the class, I did not take photos.  I had written out many thoughts, frustrations and feelings about classes in general and then decided to gesso over the entire process (aside from the sticker words I had put down).


Then of course I had to add some more color and thoughts on top.  This time I used either my Liquitex Paint Markers or Sharpie Chalk Markers to finish it up. Very happy with the results as again, this is something very different than I would normally do. 


To find out more about this class, please visit Dirty Footprints Studio here.

As many of you know, I have an issue with stencils...I can't get enough of them!! I have several favorite lines, but will say my biggest weakness are Stencil Girl Products.  I found them by chance a couple years ago when I was surfing Instagram and saw some really cool images by Traci Bautista (@treicdesigns) and then of course the search was on.  Once I  found out who the company was, I tried to get them in the shop but unfortunately, they are not selling to online shops at this time (bummer).  But as you can see, it hasn't stopped me from buying them!  I choose to buy directly from them as shipping is very reasonable and if you buy six (do not have to be the same, just same size), you get a 10% discount...which ends up paying for the shipping!


Needless to say, I needed to play with one last night!  I had a black gesso'd page already, so I decided to put a layer of DecoArt Media Cobalt Teal Hue Fluid Acrylic Paint.  Let it sit for about 30 seconds (yes, I am that impatient), and put the stencil down!


Took my baby wipes and started randomly wiping away the teal.  This stencil is the Maltese Mix 9x12" stencil.  


Usually I wait longer for the top coat to dry as I find otherwise you tend you peal off the layers of paint (they stick to the stencil).  In this case I am okay with it, works with what I am going for.  I repeated on the other page, flipping the stencil so it wasn't quite the same pattern.


This is how it stands right now.  I am hoping to get back at it today along with another 'secret' from the 21 Secrets Workshop.  It is still hot here, no rain, wind blowing towards the forest fires so no smoke for a change - may be a good afternoon to hit the deck and read one of those classes!!

Have a great May Long...stay safe!

That Other Neutral Triptych

  That Other Neutral Triptych wrapped canvases 10x10x1.5" (x3) professional grade artist materials I worked on this smaller series at ...