Thursday, March 31, 2011

Distress Stains...


So loads have been asking me, 'S0 , really - do I need these?' All I am gonna say...'do you really need me to answer that?'


So I have been scouring the net (in my spare time) for information for you all as to why you really need these in your stash. There is some pretty good stuff out there...here goes!

Distress Stains from Ranger Ink are a fluid water-based dye for papers and other porous surfaces. Use these for quick and easy ink coverage for backgrounds and larger areas. Apply layers of stain to achieve more saturated color. The brushed nylon dabber top has a built-in spring valve. This allows for controlling the release of Distress Stains from the bottle. By pressing the dabber top down onto surface, the valve opens and fluid releases. Lift dabber away from surface to stop fluid flow. Spread Distress Stains by swiping the dabber top lightly as a brush across the surface. Combine Distress Stains with Distress Stickles, Distress Inks, Distress Crackle Paints and Distress Embossing Powders to create unique projects that reflect a crafter’s style.

Currently there are ONLY 12, yes TWELVE colors available - but I pretty sure we will see more! The newly released stains are the same as colors that are in his 'family' now - spun sugar, fired brick, wild honey, peeled paint, forest moss, weathered wood, broken china, faded jeans, dusty concord, antique linen, vintage photo and walnut stain.

Here is a great video explaining it perfectly by the King himself (be sure to listen closely as he shares a few hints on what is coming next)! Or you can head over to his blog where he give a detailed description and more info on them.

I did come across a lady after my own heart though...read this while on my search...what I don't do for you all!

Hope this little tickle helps you make that decision a little bit easier!

Tim Holtz Distress Stains are IN STOCK now -
get them while you can here!

Tuesday, March 29, 2011

Do you see what I see?

Found this site over the weekend - loaded with inspiration and a little surprise along the way...'Royalty' scrolls in for a visit!

Check it out....


On a creative note - need some time to work on your craft? There is still time and a few spaces left at the annual Tomahawk & District Ag Society Spring Scrapbooking Retreat April 29 - May 1 2011.

For more information check it all out here. I'll be there....will you?

Monday, March 28, 2011

Love Tim? Want a Challenge?

Head over to Studio L3 ....you won't be disappointed!

Studio L3

in her words... "For Those About to Craft: I Salute You!"


...now it is back to work for me...have to find a place for all the new stuff!

Thursday, March 24, 2011

7 Gypsies Inspiration....

Here are a few pictures showcases some of 7 Gyspies AMAZING products!

Wall hanging: using Lille & Conservatory Collections, Book Corners, Metal Reinforcers, Ephemera, Canvas, and of course a few other odds and ends!


Vintage Ticket Holder (not yet released) and Binderie Train Tickets!


Library Drawer used as a display! Industrial Gears, Aviation Hardware Charms, Paddington Stamp & I am guessing misc clocks from Heidi Swapp!

More inspiration with the Vintage Ticket Holder using Lille Journaling Pages, Optical Lenses, Lille Tags, Mini Receipts, Mini Label Stickers and misc beads.


Vintage Receipt Holder (small), Lille Journaling Pages, ribbon (coming soon or use this) and beads.


ATC Tray decorated with Family Tag Kit, misc trims (as above) as well as misc Hardware Charms.

How's that for some inspiration today? Got your creativity juices going? I know mine are....

Wednesday, March 23, 2011

New, New...oh ya - and more NEW!

...loads of new product has arrived this morning and I believe I finally have it all up on the site!

Got loads of new (and replenished)....


Some of the new 7 Gypsies is just waiting for your touch! Be sure to check out their blog for some great inspiration!


Here are just a couple of my favs...


Note: All these images are from the 7 Gypsies company blog - further info on these projects 7/or images may be found there. It is loaded with inspiration...so be prepared to be there a while!


Maya Road has some great releases as well - one of the hottest items is their Zipper Trim...check it out here here and here among a few other items of course!

take some time to check out some of your favorite companies blogs - you will not be disappointed. You will soon discover why those dang shiny objects keep getting in my way!

Tuesday, March 22, 2011

Come out Come out wherever you are!

...can you hear it? I think I hear angels singing? Pretty close....I see Tim Holtz! The man that can simply bring out the best creativity in ANYONE given the chance! Well, I welcome the chance...heck - I had the chance and I want MORE!


So for now - here are samples of items from his display at the retailers event I recently attended...

Configeration Shadowbox:

Configurations Print Tray:


Distress Stains (sampled on the new Kraft Resist Paper, Grungeboard/Paper & Lavish Trimmings):

Ranger Foil Sheets, embossed using Texture Fades and colored up using Alcohol Inks (and added blingage with Time Pieces, Sprocket Gears & Game Spinners):

Layout using Stampers Anonymous "Wild West" Stamp Set, Alterations Dies & BoBunny Time Piece Collection papers:

Layout using several Alteration Dies - Steam Punk On the Edge, Weathered Clock, Mini Butterflies & Friends Magnetic Mover & Shapers; the letters I believe are from his new Ransom Alphabet Parts (or his Ransom Mask) and the papers are from the new Crowded Attic Paper Stash:

Decked out altered mirror using Fragments (clear tiles) and paper once again from Crowded Attic Paper Stash:

This is an amazing piece using LOADS of his products. It is a technique he used from his Compendium of Curiosities Book:

And finally here is the entire display....can you here it?
All products are available at the store...or will be soon (just impatiently waiting for release dates and good ol' ups)! Until then...

Monday, March 21, 2011

G45...overload? Not a Chance!

So today I am just going to share with you all the pictures I took of the Graphic 45 booth at the retailers event earlier this month....

First we have Aimee & Diane (co-owners of Graphic 45) sharing with us the abundance of inspiration and a cute tag make n' take (see previous post).

Now let's get ready for our curtain call...


Can you believe all I took was this one picture of Le Cirque? Well here it is...still pretty amazing though isn't it?!

If you want to see more Le Cirque (and close up pictures of the mini book on the table in front of Aimee) see this previous post.

Now that this short but sweet (and creativity overloaded) post has you wanting more - why not head over to their blog and see what they have to share as well! Take note of today's post where they are chatting about their visit to Edmonton!

Ready to start working on some of these...all products can be purchased at the store - W2 Scrapbooking!

Saturday, March 19, 2011

(More) What a Day 1 &2!

Heads up gang - this post is LOADED with pictures...could be here a while!
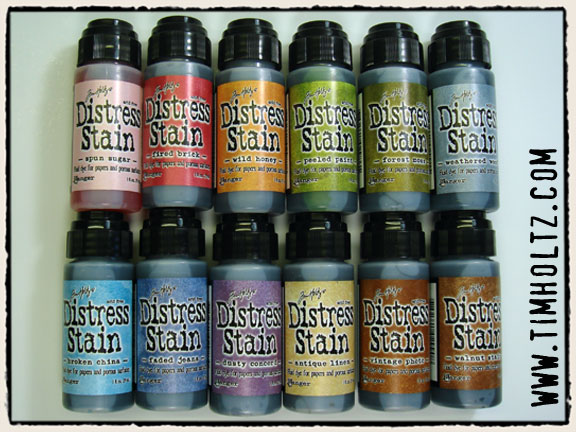
Class one was Ranger (see previous post);

Class two was Copic - kind of a hard one to post pictures of since it was all done a a single sheet of 8.5 x 11" paper - simply showing us how to 'color' with Copic Markers. Interesting stuff...


Class three (last one on day one): We R Memory Keepers! We used a TON of their tools in this one and made a mini book using the new Fiesta Collection.

We some of the tools we used were the Cinch to make the book, the Brad Setter & Piercing and Heart Attack (distresser, which you can see I used a lot more than what was told of us...loved it and loved the look it gave); also used Ranger's Mini Misters to soften the paper to make the 'flowers' pliable.

...front of book
...inside pages....inside pocket pages. Tip: if you find you don't have a bone folder/scor tool...fold your paper first to the wrong side then flip and fold the correct sides together. Reasoning is that if there are any imperfections (ie - WRMK papers are all while core), they will not show when folded the correct way! huh....
...back of book.

Using the Cinch was very easy. It is a great tool to have (if you don't already have one). I already have the Bind-it-All (and CombBind), so have a hard time justifying yet another binding tool. One thing I will say is a con...is the size. But ease of use and versatility - AWESOME!


First class of Day Two was Clearsnap. This class was taught by one very talented lady. She only buys heavy weight white cardstock and creates all her own background papers! Loads of techniques were shared along the way.

Here are some samples of the background papers I made (the die cut flourish is inked as then UTEE is applies twice). The Damask & Flowers were both inked first and then ironed to remove the ink (back down to the original cardstock). One the floral one, you can see where I used a permanent marker and 'doodled' on the flowers to added oomph!


This first photo (from this class) and this one are samples of some of the goodies we used!


Class two was once again Ranger (like I said...TIM and did I mention Mario was along for the ride both days?) Day two was "Creative Outlets Tag Series 2"...once again we did two tags and used a ton of layers and got to use a load more of products & techniques.

The first tag was using an texture fade (in this case the wood grain) right on the tag. Inked it up using the Adirondack Paint Dabbers (allowed it to dray and then lambasted it with distress inks) and finished it off with Perfect Pearls.

The flowers are made out of the new Glassine Paper Stash and then cut out with the Tattered Florals Alteration Die (jazzed up with Accourtrements). Other dies used were Mini Branch & Leaf and Caged Bird.

Tag two was Alcohol Inks! Can yo say fun fun fun!!! So someone who is NOT into pink at all...I am kinda diggin' this one!

We started off using the alcohol inks on the Ranger Gloss White Cardstock (pre cut with the Tag & Bookplate die), played with it, allowed it to dry and then stamped using Rangers Archival Jet Black Ink and one of the NEW sets - Steampunk! We then added layers of elements (the three dudes are stamped on grunge board and then inked- alcohol - acetate 'packaging' was used to cut out the gears using the new (not yet released) Steampunk On the Edge die (inked that too), added yet another layer with Filmstrip Ribbon, Time Pieces, Game Spinners & Pen Nibs! All attached with either the Tiny Attacher or Glossy Accents!

Okay speaking of Glossy Accents ...Tim's Tip Time! Did you know that if you simply tap the bottom of the Glossy Accents bottle on the table before you put the cap back on - NO MORE CLOGS! It works!


Class three - Graphic 45! Diane from G45 taught the class and has some pretty cool ideas! These pictures are actually from her book as most of us did not have the chance to finish the book. But the best thing...check out the spine of the book! The collection used here was Le Cirque...b-e-a-u-ti-ful!

Here is the spine! It is made out of the Geometric Door Plate & Knob! How cool is that!!!

Inside was three (I think) pages that were of varying sizes and had these great larger jump rings that she is going to let me know where I too can get them!


I know I have even more to share with you...but I am exhausted just posting all of this! I will get to more soon. There is a TON of new product due in over the next week or so...many of the pre orders you have all asked for! I will let you know when it all arrives! Until then....

That Other Neutral Triptych

  That Other Neutral Triptych wrapped canvases 10x10x1.5" (x3) professional grade artist materials I worked on this smaller series at ...